Choosing the Right Approach for Garage Floor Crack Repair
As a sustainable living advocate, I always suggest that the greenest building is the one already standing. Maintaining your concrete floor prevents the need for resource-heavy tear-outs and replacements. However, not all cracks are created equal. Before you grab a random bottle of concrete floor filler, you need to understand that the 'why' behind the crack dictates the 'how' of the repair.
Here is the thing: concrete is a rigid material that naturally wants to shrink and move. When it is constrained, it cracks. Fixing garage floor issues permanently requires matching the repair material to the movement of the slab. If you use a rigid filler on a joint that needs to move, it will fail. If you use a soft filler on a structural crack, you won't provide the necessary reinforcement.
Method 1: Rigid Epoxy Crack Filler
Epoxy is the gold standard for structural garage floor crack repair. It is a two-part resin system that, once cured, is actually stronger than the concrete itself. This is where it gets interesting: epoxy doesn't just fill the gap; it welds the two sides of the concrete back together.
Pros and Cons of Epoxy
- Pros: Extreme bond strength, waterproof, chemical resistant, and prevents further widening of the crack.
- Cons: Generally more expensive, requires precise mixing, and has no flexibility. If the house continues to settle, a new crack may form right next to the old one.
Best Use Cases
Epoxy is ideal for 'static' cracks—those that have stopped moving over time. It is also the necessary choice if you plan on applying a full epoxy floor coating later, as it provides a seamless, hard surface that won't telegraph through the topcoat.
Method 2: Polyurethane and Polyurea Sealants
Now, the important part: some cracks are meant to move. These are often found at expansion joints or in areas where the slab is subject to significant temperature swings. Polyurethane and polyurea are elastomeric, meaning they stay flexible after curing.
Pros and Cons of Polyurethane
- Pros: Excellent flexibility, high durability, and easier to apply (often comes in a standard caulk tube). Polyurea, specifically, cures much faster than standard polyurethane.
- Cons: Cannot be easily sanded smooth, and it won't provide structural reinforcement. It also tends to have a higher VOC (Volatile Organic Compound) content unless you specifically look for eco-friendly variants.
Best Use Cases
Use these for 'dynamic' cracks or expansion joints. If you live in a climate with extreme seasonal temperature changes, a flexible filler prevents the concrete from buckling or further spalling when it expands in the summer heat.
Method 3: Cementitious Patching Compounds
These are traditional, cement-based powders mixed with water or a liquid polymer. They are what most people miss when looking for a 'quick fix' because they are inexpensive and available at every hardware store.
Pros and Cons of Cementitious Patches
- Pros: Low cost, matches the texture of the existing floor, and is often the most 'natural' material choice.
- Cons: Prone to shrinking and cracking itself, poor adhesion to old concrete unless a bonding agent is used, and it is not waterproof.
Best Use Cases
These are best for deep, non-structural holes or 'spalling' (where the surface is flaking off) rather than thin cracks. From a sustainability perspective, they have a lower carbon footprint than petroleum-based resins, but their shorter lifespan may lead to more frequent repairs.
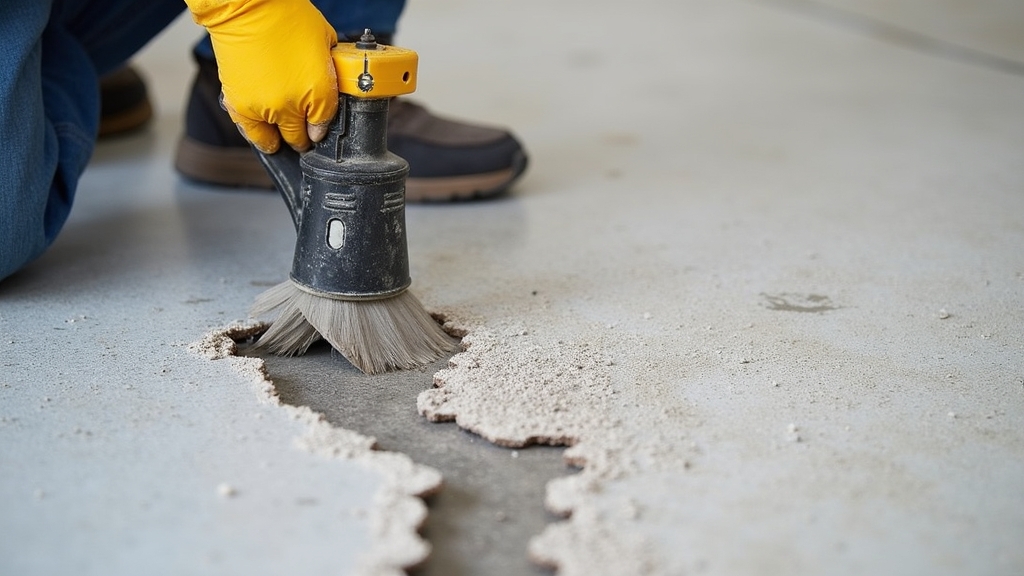
Preparation: The Step Most People Miss
Regardless of the material you choose, the secret to a repair that lasts a decade versus one that lasts a month is preparation. You cannot simply pour filler into a dusty crack and expect it to hold. Worth mentioning: a clean crack is a permanent crack.
- Chase the Crack: Use a small angle grinder with a diamond blade to 'V' out the crack. This creates more surface area for the filler to grab onto.
- Clean Thoroughly: Use a vacuum with a HEPA filter to remove all dust. Avoid washing with water if you are using epoxy, as moisture is the enemy of resin adhesion.
- Degrease: If the garage floor has oil spots, use an eco-friendly citrus-based degreaser. Standard concrete floor filler will not bond to oil-soaked substrates.
Cost and Sustainability Comparison
| Method | Estimated Cost (per 10 linear ft) | Environmental Impact | Durability |
|---|---|---|---|
| Epoxy Resin | $40 - $70 | Medium (Petroleum-based) | High (20+ years) |
| Polyurethane | $15 - $30 | High VOCs | Medium (10-15 years) |
| Cementitious | $10 - $20 | Low (Mineral-based) | Low (3-5 years) |
Something to keep in mind: The most sustainable choice is the one you only have to do once. While cementitious patches have lower initial 'embedded energy,' the frequent re-application and eventual failure make them less eco-friendly over a 30-year period compared to a high-quality epoxy crack filler.
Final Recommendation: Which Should You Choose?
On the other hand, if you are a DIYer looking for the most practical solution, here is my breakdown:
- For hairline cracks: Use a high-penetration epoxy. It wicks deep into the concrete to stabilize it.
- For wide expansion joints: Use a self-leveling polyurea. It handles the movement and stays watertight.
- For large pits or craters: Use a polymer-modified cementitious patch with a separate bonding agent.
The good news is that by tackling these repairs now, you are preserving the structural integrity of your home and preventing water from seeping into the soil beneath your slab, which can cause much larger environmental and financial headaches down the road.