Understanding the Impact of Garage Floor Cracks
In most homes, the garage floor is the most neglected slab of concrete on the property. We drive heavy vehicles over it, spill chemicals, and subject it to extreme temperature swings. Over the years, I have learned that a small hairline crack is rarely just an aesthetic issue. It is often the first sign of subgrade settling or moisture intrusion. If left unaddressed, water can seep into these fissures, freeze, expand, and eventually cause the concrete to spall or heave.
The real issue usually is not the crack itself, but what happens beneath it. When you decide to repair a garage floor, the method you choose determines whether you are applying a temporary bandage or a long-term solution. From experience, homeowners often rush into buying the first bottle of concrete crack filler they see at the hardware store without realizing that different types of damage require fundamentally different chemical approaches.
The Four Primary Methods for Fixing Garage Concrete
When it comes to garage floor maintenance, four main categories of repair materials dominate the market. Each has a specific chemical composition designed for different types of concrete movement and stress.
1. Liquid Concrete Crack Fillers (Rigid)
These are typically water-based or acrylic-based liquids designed to pour directly into thin cracks. They are formulated to be self-leveling, meaning they flow into the crevice and settle flat with the surface. What works best with these is their ease of application for the average DIYer.
2. Flexible Polyurethane Sealants
Unlike rigid fillers, polyurethane sealants remain flexible after they cure. This is a critical distinction. Concrete expands and contracts with the seasons. If you have a crack that is prone to movement, a rigid filler will simply crack again. A common situation is seeing these used in expansion joints or where the garage floor meets the driveway apron.
3. Epoxy and Polyurea Injection Systems
For structural repairs, epoxy is the gold standard. These systems involve two-part chemicals that, when mixed, create a bond stronger than the concrete itself. They are often used for deep or wide cracks where the structural integrity of the slab is a concern. One thing many people overlook is that epoxy does not shrink, which makes it ideal for heavy-traffic areas.
4. Cementitious Patching Compounds
These are essentially modified mortars. They come in powder form and are mixed with water or a liquid bonding agent. They are best for shallow, wide depressions or 'potholes' in the concrete rather than narrow, deep cracks. From my experience, these require the most surface preparation to ensure they don't pop out under the weight of a vehicle.
Detailed Pros and Cons Comparison
Liquid Fillers
- Pros: Very inexpensive, easy to apply, no special tools required, fast drying time.
- Cons: Limited durability, not suitable for cracks wider than 1/4 inch, can shrink as they dry, and they do not handle slab movement well.
Flexible Polyurethane
- Pros: Excellent longevity, handles thermal expansion, waterproof, prevents weeds and insects from entering cracks.
- Cons: Can be messy to apply, requires a caulking gun, and usually requires a backing rod for deep cracks to prevent three-point bonding.
Epoxy Injection
- Pros: Permanent structural repair, high compressive strength, chemical resistant, fills the entire depth of the crack.
- Cons: Highest cost, requires precise mixing, usually involves more intensive surface grinding, and once it is down, it is nearly impossible to remove.
Cost Comparison and Longevity
What I have found is that the initial cost of the material is often inversely proportional to how often you will have to re-apply it. Liquid fillers are the most budget-friendly upfront, often costing less than twenty dollars for a standard garage. However, in a climate with freeze-thaw cycles, you may find yourself re-filling those same cracks every two to three years.
Polyurethane sealants fall in the mid-range. While the tubes are slightly more expensive and require backing material, they can easily last seven to ten years. Epoxy systems represent the highest investment. Between the specialized injection ports, high-grade resins, and necessary surface preparation tools (like grinders), you are looking at a much higher price point. However, an epoxy repair is generally considered a one-time fix for the life of the slab.
Best Use Cases: Choosing the Right Tool for the Job
One thing many people overlook is matching the material to the 'personality' of the crack. Not all cracks are the same. Some are 'dormant' (they haven't moved in years), while others are 'active' (they grow or shrink depending on the weather).
- For Hairline Cracks: If you can't even fit a penny into the crack, a thin liquid filler is usually sufficient to prevent moisture from entering.
- For Moving Cracks or Joints: If the crack is near the edge of the slab or is an intentional expansion joint, use a flexible polyurethane. This allows the concrete to 'breathe.'
- For Structural Foundation Cracks: If the crack runs up a wall or shows a significant height difference between the two sides (lippage), an epoxy injection is the only way to go to stabilize the slab.
- For Surface Spalling: If the top layer of the concrete is flaking off, a cementitious patch with a bonding agent will provide the best aesthetic finish.
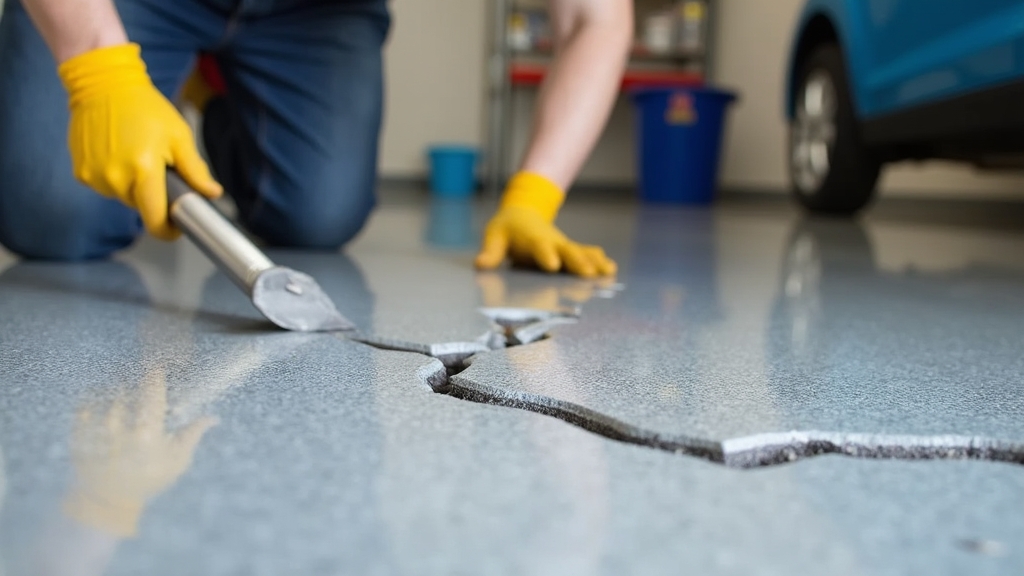
Step-by-Step Approach to Repair
The key thing to remember is that 90% of a successful repair happens before you open the product. From experience, the biggest reason repairs fail is poor adhesion caused by dust and oil. Garage floors are notorious for holding onto motor oil and tire carbon. A common situation is a homeowner applying a high-quality filler over a dusty crack, only to have it peel up a month later.
- Cleaning: Use a wire brush or a vacuum to remove every bit of loose debris. If there is oil, use a degreaser.
- Widening (Optional): For very thin cracks, I often use a small grinder to 'chase' the crack, creating a V-shape. This provides more surface area for the filler to bond to.
- Backing: For deep cracks, tuck a foam backer rod into the gap. You only want the sealant to be about 1/4 to 1/2 inch deep.
- Application: Overfill slightly, then use a putty knife to scrape the surface flush with the rest of the floor.
Final Recommendation Based on Situation
In my experience, for the average homeowner looking for the best balance of cost and durability, a high-quality flexible polyurethane sealant is the winner. It addresses the most common issue—moisture intrusion and thermal movement—without the extreme cost and complexity of epoxy. However, if you are planning on applying a full garage floor coating (like a decorative flake or solid color), you must use a rigid epoxy filler. Flexible sealants will cause the top coating to crack as the sealant moves beneath it.
Ultimately, the goal of fixing garage concrete is to preserve the integrity of your home. By choosing the right material now, you prevent a simple crack from turning into a costly slab replacement down the road.