{ "title": "Installing Basement Window Well Covers to Prevent Leaks", "slug": "installing-basement-window-well-covers", "excerpt": "Learn how to install window well covers to prevent basement leaks and improve drainage. A practical DIY guide for a dry, debris-free basement.", "content": "
The Importance of Basement Window Well Covers
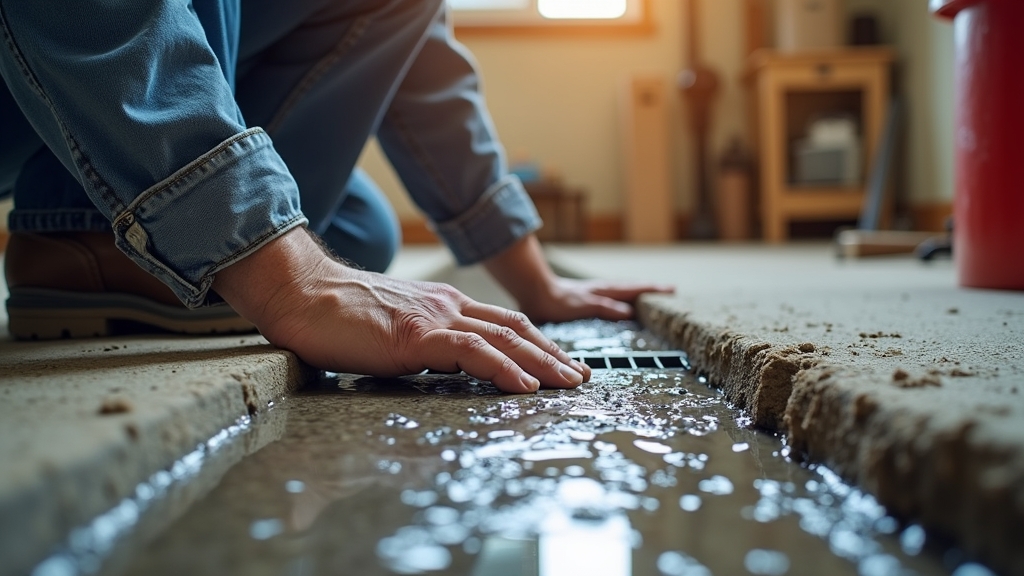
When we think about basement maintenance, we usually focus on sump pumps or French drains. However, there is a simpler, often overlooked culprit for damp basements: the window well. Here is the thing: a window well without a cover is essentially a bucket attached to your foundation. During a heavy downpour or a spring thaw, that bucket fills up, puts hydrostatic pressure against your window, and eventually, the water finds its way inside.
Installing a window well cover is one of those high-impact, low-cost home improvements that you can finish in a single afternoon. It does more than just keep out the rain; it stops leaves from rotting in the well, prevents small animals from getting trapped, and even helps with basement insulation. Now, the important part to understand is that a cover is not a waterproof seal, but a water diversion tool. When installed correctly, it directs moisture away from the foundation and ensures your basement stays dry and livable.
Essential Tools and Materials
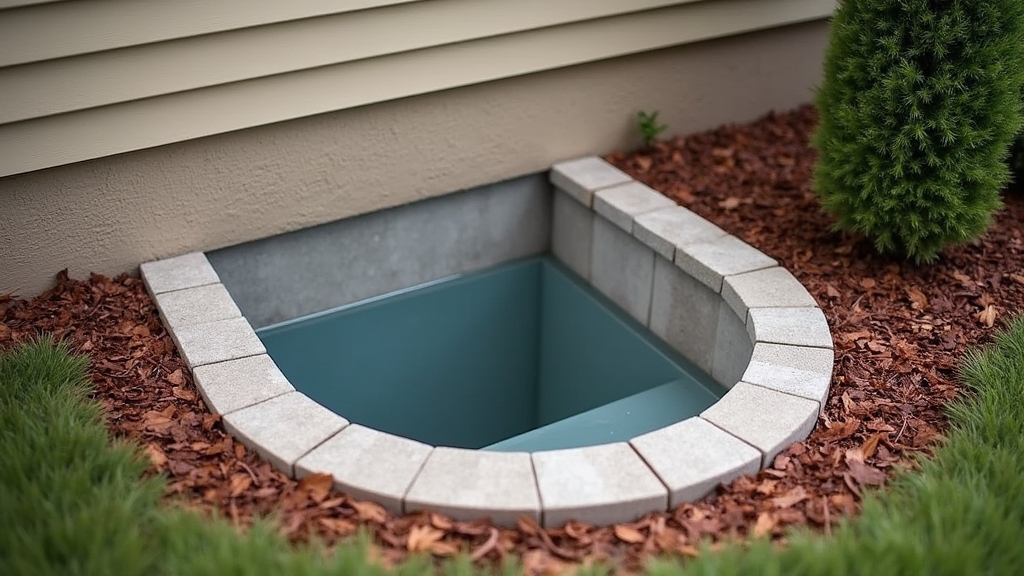
Before you head to the hardware store, you need to assess what kind of well you have. Most residential window wells are either corrugated metal, poured concrete, or plastic. The material of your well determines the fasteners you will need. What most people miss is checking the masonry of the house itself; if you are mounting the cover to the siding or the brick, you will need specific drill bits and anchors.
The Basic Toolkit
- Power drill and a set of masonry bits
- Screwdriver or nut driver (depending on the hardware provided)
- Measuring tape
- Level
- Permanent marker
- Clear silicone caulk (outdoor rated)
- Window well cover (sized to your specific well)
- Mounting clips or hardware kit
The good news is that most pre-manufactured covers come with a universal mounting kit. However, I always recommend having a few extra stainless steel screws on hand just in case the provided hardware isn't quite right for your home’s exterior material.
Preparation: Measuring and Cleaning
This is where it gets interesting: many homeowners buy the wrong size cover because they only measure the width of the window. You actually need to measure the widest part of the window well rim, as well as the distance the well extends from the house wall. Worth mentioning is that you should allow for an inch or two of overlap on the sides to ensure water sheds completely off the edges rather than dripping back into the well.
Cleaning the Well
You cannot install a cover over a mess and expect it to work. Start by removing all debris, old leaves, and silt from the bottom of the well. If your well has a gravel base, check to see if the gravel is clogged with dirt. If it is, water won't drain into the soil below, even with a cover. Scrape out the top layer of dirty stones and replace them with fresh, clean ¾-inch crushed stone. This ensures that any incidental moisture that does get in can dissipate quickly.
Step-by-Step Installation Instructions
Once your well is clean and you have the right size cover, it is time to get to work. Most DIY covers are made of polycarbonate or heavy-duty plastic, which are easy to handle but can be brittle if you aren't careful during the drilling process.
1. Position and Align
Place the cover over the window well. If your cover has a slope (which I highly recommend), the high side should be flush against the house. Use your level to ensure the cover isn't tilted awkwardly to one side. If your house has siding, you might need to tuck the back edge of the cover slightly under a siding lap, though this isn't always possible or necessary. On the other hand, if you have a brick or stone exterior, the cover will simply sit flush against the surface.
2. Mark the Mounting Points
Most covers use clips that attach to the rim of the window well or bolts that go directly into the house. While holding the cover in place, use your marker to indicate where the clips will sit. Space them evenly—usually two on the sides and one or two in the front. Something to keep in mind is that if you live in a high-wind area, you may want to add an extra clip to prevent the cover from catching air like a sail.
3. Drill the Pilot Holes
If you are attaching clips to a metal well, you can often use self-tapping screws. If you are mounting into concrete or brick, you must use a masonry bit. Set your drill to the hammer setting if available, and drill holes slightly deeper than the length of your anchors. Avoid drilling into the mortar joints if you can; the brick itself provides a much more secure hold for the weight of the cover.
4. Secure the Clips
Attach the clips or the mounting rail to the well or the house wall. Don't tighten the screws all the way just yet. You want a little bit of wiggle room to make sure the cover sits perfectly. Once everything is aligned, snug down the fasteners. The cover should feel firm and shouldn't rattle when you give it a light shake.
5. Seal the Back Edge
This is a step that many DIYers skip, but it is vital for preventing basement leaks. Run a bead of clear outdoor silicone caulk along the line where the cover meets the house. This prevents water from running down the siding and slipping behind the cover. It’s a small detail that makes a massive difference during a driving rainstorm.
Tips for Best Results
To get the most out of your installation, keep maintenance in mind. While the cover blocks most debris, fine dust and pollen will still find their way in. Once a year, pop the clips and spray out the inside of the well with a hose. This ensures your drainage layers remain functional.
If you are installing a cover on an egress window (a basement bedroom exit), ensure the cover can be easily popped off from the inside. Never lock or bolt an egress cover in a way that requires a tool to open. Safety should always come before weatherproofing. Look for covers with quick-release clips designed specifically for emergency exits.
Troubleshooting Common Issues
If you notice condensation building up on the underside of the cover, it usually means there is too much moisture in the ground inside the well. This often happens if the house's grade is sloping toward the well. You may need to adjust the soil levels around the outside of the well to ensure water is moving away from the area entirely.
Another common issue is "wind lift." If your cover frequently blows off, the clips are likely too loose. You can solve this by adding a small length of galvanized chain from the cover to a hook inside the well, providing a "tether" that keeps the cover from traveling far if the clips fail during a storm.
Frequently Asked Questions
Should window well covers be airtight?
No, they should not be airtight. Basement windows need a small amount of ventilation to prevent stagnant air and humidity buildup. The goal is to shed water and keep out debris, not to hermetically seal the space. A small gap for airflow is actually beneficial for the longevity of your window frames.
What is the best material for a window well cover?
Polycarbonate is generally considered the best choice. It is much stronger than standard plastic, won't turn yellow and brittle from UV exposure as quickly, and can support more weight—which is important if a child or pet accidentally steps on it. While more expensive than thin plastic, it lasts significantly longer.
Can I install a cover if my window well is irregular?
Yes, though you might not be able to use a standard "off-the-shelf" rectangular or circular cover. For irregular wells, you can purchase oversized rectangular polycarbonate sheets and trim them to fit using a circular saw with a fine-tooth blade. Just be sure to wear eye protection and cut slowly to avoid cracking the material.
How do I know if I need to replace my current cover?
If you see visible cracks, significant yellowing, or if the cover has become warped and no longer sits flush against the house, it is time for a replacement. A warped cover can actually funnel water into the well rather than away from it, defeating the entire purpose of the installation.
", "tags": ["basement maintenance", "waterproofing", "DIY home improvement", "window wells"], "readTime": 8, "metaTitle": "How to Install Window Well Covers: Prevent Basement Leaks", "metaDescription": "Stop basement leaks and keep debris out. This guide covers measuring, choosing, and installing window well covers for a dry, protected basement.", "focusKeyword": "window well covers", "faqs": [ { "question": "Should window well covers be airtight?", "answer": "No, they should not be airtight. Basement windows need a small amount of ventilation to prevent stagnant air and humidity buildup. The goal is to shed water and keep out debris, not to hermetically seal the space." }, { "question": "What is the best material for a window well cover?", "answer": "Polycarbonate is the top choice because it is impact-resistant, handles UV exposure without yellowing quickly, and can support weight better than standard thin plastic covers." }, { "question": "Can I install a cover if my window well is irregular?", "answer": "Yes. You can buy oversized polycarbonate sheets and trim them to the specific shape of your well using a circular saw with a fine-tooth blade." }, { "question": "How do I know if I need to replace my current cover?", "answer": "Replace your cover if you see cracks, warping, or heavy clouding. A warped cover can actually misdirect water into the well rather than shedding it away." } ], "tableOfContents": [ { "id": "the-importance-of-basement-window-well-covers", "title": "The Importance of Basement Window Well Covers", "level": 2 }, { "id": "essential-tools-and-materials", "title": "Essential Tools and Materials", "level": 2 }, { "id": "the-basic-toolkit", "title": "The Basic Toolkit", "level": 3 }, { "id": "preparation-measuring-and-cleaning", "title": "Preparation: Measuring and Cleaning", "level": 2 }, { "id": "cleaning-the-well", "title": "Cleaning the Well", "level": 3 }, { "id": "step-by-step-installation-instructions", "title": "Step-by-Step Installation Instructions", "level": 2 }, { "id": "tips-for-best-results", "title": "Tips for Best Results", "level": 2 }, { "id": "troubleshooting-common-issues", "title": "Troubleshooting Common Issues", "level": 2 }, { "id": "frequently-asked-questions", "title": "Frequently Asked Questions", "level": 2 } ] }