Why Window Well Covers Matter for Your Eco-Friendly Home
As a sustainable living advocate, I often see homeowners invest heavily in solar panels or high-efficiency HVAC systems while ignoring the literal holes in their foundation. Basement window wells are designed to allow light and emergency egress, but without proper covers, they become collection points for rain, snow, and debris. Here is the thing: an unprotected window well is essentially a funnel that directs hydrostatic pressure straight toward your foundation seals.
By installing high-quality window well covers, you aren't just performing simple maintenance; you are implementing a critical layer of basement drainage protection. This prevents basement leaks, reduces the risk of mold—which can severely compromise indoor air quality—and adds a layer of thermal insulation that keeps your basement warmer in the winter and cooler in the summer.
The Science of Basement Drainage and Window Wells
To understand why covers are necessary, we have to look at how water behaves around your home. Most window wells feature a drain at the bottom that connects to the weeping tile or a dedicated sump pump system. Now, the important part: when autumn leaves, spring silt, or winter ice clog this drain, the well fills like a fish tank. Once the water level reaches the window sill, even the best-installed window will eventually succumb to the pressure and leak.
This is where it gets interesting: many homeowners assume the window itself is the problem. In reality, the issue is often the micro-environment within the well. By sealing this area with a sloped, UV-resistant cover, you redirect the bulk of the water away from the foundation, allowing the internal drainage system to handle only the minor moisture it was designed for.
Seasonal Guide: Maintenance and Installation Timing
Timing your installation or maintenance is key to ensuring the longevity of your basement's structural integrity. Following a seasonal schedule prevents small issues from becoming expensive repairs.
Spring: The Great Thaw and Inspection
Spring is the most critical time for your window wells. As snow melts and heavy rains begin, you need to ensure your covers haven't cracked under winter's weight. Check the seal between the cover and the house siding. If you notice water pooling inside the well despite having a cover, your drainage gravel may be clogged with fine silt. Worth mentioning is that you should refresh the top 2-3 inches of gravel every few years to maintain high permeability.
Summer: UV Protection and Ventilation
In the heat of summer, cheap plastic covers can become brittle and yellow. What most people miss is the greenhouse effect: an unventilated window well cover can trap heat against your basement window, potentially damaging seals or increasing your cooling load. Look for covers with small, built-in ventilation gaps or choose high-quality polycarbonate that reflects a portion of the IR spectrum.
Fall: Debris Management
The primary goal in autumn is keeping organic matter out of your drainage system. Decaying leaves turn into a thick mulch that is waterproof—but in the wrong way. It creates a seal over your drain, ensuring that the next rainstorm floods the well. Ensure your DIY window well cover fits flush against the corrugated metal or masonry of the well to prevent leaves from blowing in through the sides.
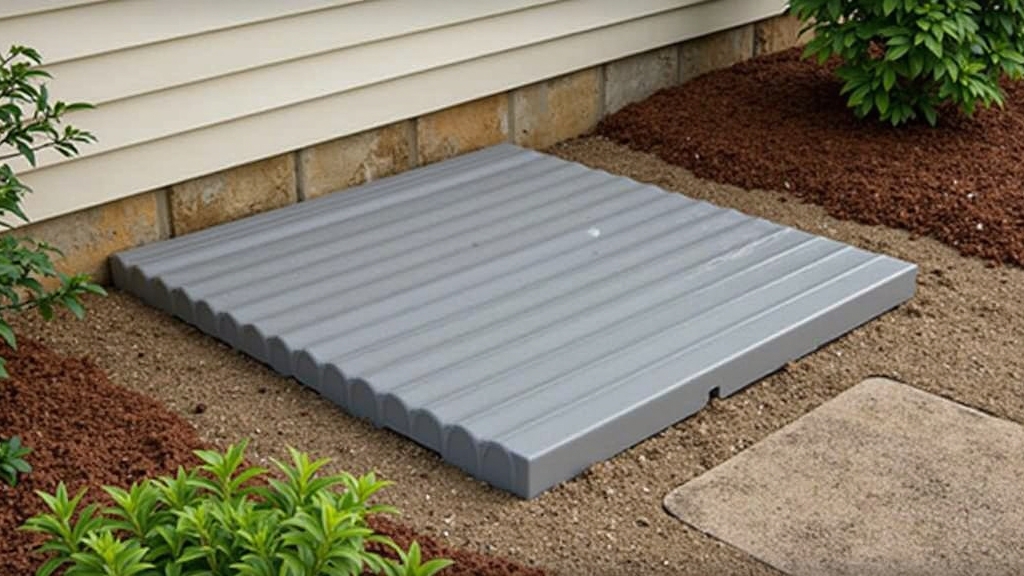
Winter: Snow Load and Egress Safety
If you live in a snowy climate, the structural integrity of your cover is paramount. A standard 'bubble' cover from a big-box store may collapse under a heavy snow drift. The good news is that heavy-duty sloped covers can support significant weight while still being light enough to pop off from the inside in case of an emergency egress situation.
Step-by-Step: DIY Window Well Cover Installation
Installing a cover is a manageable weekend project that pays dividends in peace of mind. Here is how to do it correctly from a sustainable perspective.
- Measure Twice: Measure the width of the well (from edge to edge along the house) and the projection (how far it sticks out from the wall). Always round up; a cover that is too small is useless, but one that is slightly large can be trimmed or centered.
- Clean the Well: Before installing the cover, remove all debris, old leaves, and trash. Dig down about 2 inches into the gravel to ensure it is loose and draining properly.
- Choose Sustainable Materials: Opt for clear polycarbonate over acrylic. Polycarbonate is 200 times stronger than glass, highly recyclable, and lasts significantly longer, reducing landfill waste.
- Positioning and Drilling: Center the cover over the well. If you are attaching it to the house, use stainless steel screws and washers to prevent rust streaks on your siding. If attaching to the metal well rim, use specialized clips.
- Sealing the Back Edge: On the other hand, if your house has uneven siding (like cedar shakes or lap siding), you may have a gap between the cover and the wall. Use a bead of clear, exterior-grade silicone caulk to create a watertight seal. This prevents water from running down the wall and behind the cover.
Common Installation Pitfalls to Avoid
Something to keep in mind is that the cheapest option often costs more in the long run. Many homeowners buy flimsy plastic covers that crack after one season of UV exposure. This creates a cycle of waste that we want to avoid. Look for "unbreakable" polycarbonate ratings.
Another common mistake is ignoring the egress requirements. If the basement room is a bedroom, the cover must be easily removable from the inside without the use of tools or keys. Check your local building codes to ensure your DIY window well project remains compliant with fire safety standards.
The Eco-Friendly Advantage
Beyond moisture control, these covers act as a thermal buffer. By creating a pocket of dead air, they reduce the convective heat loss through basement windows. This is a small but cumulative gain in your home’s overall energy profile. Furthermore, by preventing basement leaks, you avoid the massive carbon footprint associated with basement remediation—which often involves replacing drywall, insulation, and flooring, all of which are energy-intensive to produce and dispose of.