Most basements start their life as a cold, dusty afterthought. For many homeowners, the concrete floor is the biggest obstacle to making the space feel like a genuine part of the home. It’s porous, it’s prone to dampness, and it constantly sheds fine dust that seems to migrate upstairs no matter how often you sweep. Painting the floor seems like the logical DIY fix, but here is the thing: if you approach a basement floor like you approach a bedroom wall, the results will be a peeling, bubbling mess within six months.
Understanding the Concrete Environment
To get a finish that actually lasts, you have to understand what you are working with. Concrete is a sponge. Even if it looks dry to the touch, it is constantly breathing and moving moisture from the ground beneath your home up into the air. This process, known as capillary action, is the primary reason why standard paints fail in a basement setting.
Moisture and Hydrostatic Pressure
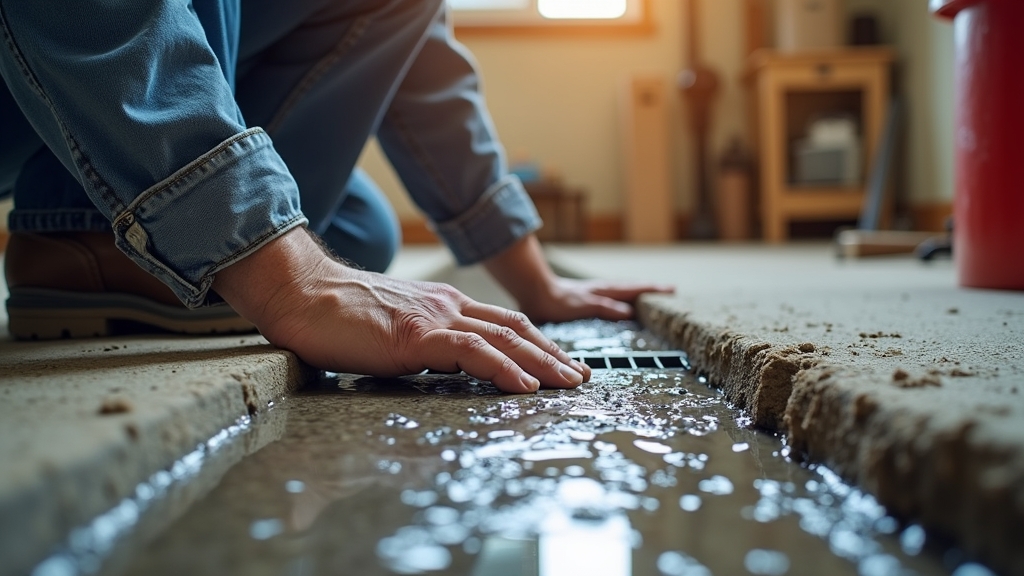
What most people miss is the sheer force of water. Hydrostatic pressure occurs when groundwater builds up outside your foundation and pushes against the concrete. If you apply a non-breathable coating to a floor with high moisture transmission, that pressure will eventually pop the paint right off the surface. This is why a simple moisture test is the most important first step you can take.
The Problem with Laitance
Now, the important part about new or even older concrete is something called laitance. This is a weak, milky layer of cement dust and sand that rises to the surface when the slab is poured. If you paint directly onto laitance, you aren't actually bonding to the concrete; you’re bonding to a layer of dust that will eventually flake away, taking your expensive floor paint with it.
Immediate Steps for Preparation
Before you even look at a color swatches, you have to ensure the canvas is ready. Preparation accounts for about 80% of the success of a basement makeover. If you rush this part, the long-term viability of the project is effectively zero.
The Plastic Sheet Test
This is where it gets interesting because you can diagnose your floor with nothing more than a piece of plastic and some duct tape. Tape a two-foot square of clear plastic to the floor, sealing all edges tightly. Wait 48 hours. If there is condensation on the underside of the plastic or if the concrete looks darker, you have a moisture problem that a standard floor paint cannot handle. On the other hand, if it’s bone dry, you’re a candidate for more advanced coatings like epoxy.
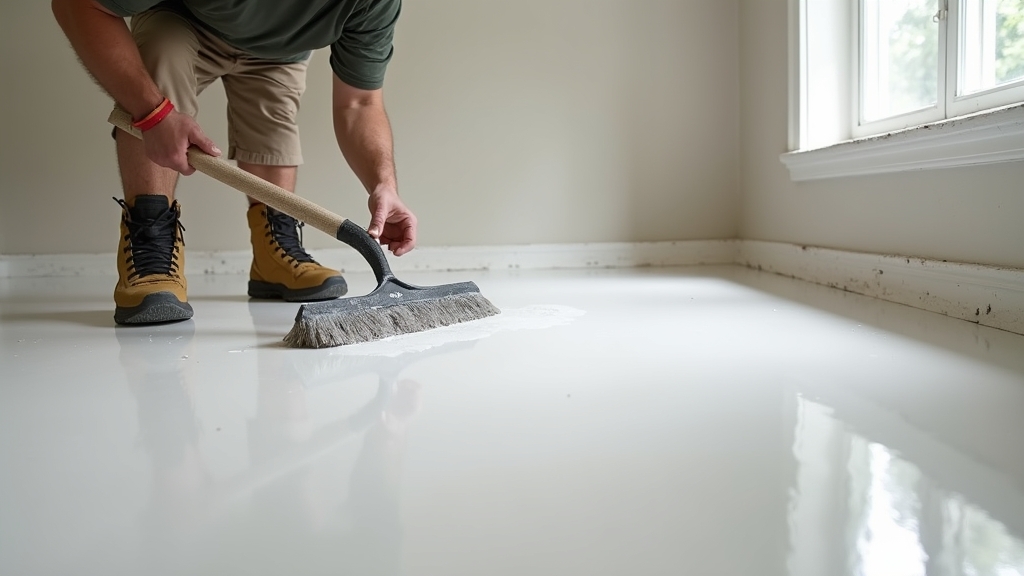
Mechanical and Chemical Cleaning
Concrete must be porous enough to "grab" the coating. A popular method is acid etching, which uses a mild phosphoric acid solution to open up the pores of the concrete, giving it a texture similar to fine-grit sandpaper. This is vital for a concrete sealer or epoxy coating to bite into the surface. Worth mentioning: if your floor has been previously sealed or painted, etching won't work. You’ll need to mechanically grind the surface to get back to raw concrete.
Choosing the Right Coating
Not all finishes are created equal. Your choice should be dictated by how you plan to use the space and the results of your moisture test.
Concrete Sealers
If you prefer a more industrial, matte look, a penetrating concrete sealer is an excellent choice. These don't sit on top of the concrete; they chemically react within the pores to create a barrier. The good news is that they are breathable, meaning they won’t peel if a little moisture moves through the slab. However, they won't hide imperfections or change the color of the floor significantly.
Epoxy Coatings
For a permanent, garage-grade finish, a two-part epoxy coating is the gold standard. Unlike paint, epoxy is a thermosetting resin that cures rather than dries. It creates a thick, incredibly durable plastic-like shell. Something to keep in mind, however, is the "pot life." Once you mix the two components, you have a very limited window of time to apply it before it hardens in the bucket.
Long-Term Prevention Strategies
A beautiful floor is only as good as the environment it sits in. To ensure your basement makeover lasts for decades, you have to look outside the basement walls.
Managing Exterior Drainage
If you want your floor paint to stay put, keep the water away from the foundation. Ensure your gutters are clean and that downspouts discharge at least six feet away from the house. If the ground slopes toward your foundation, you are inviting moisture to sit against your basement floor, which will eventually compromise any coating you apply.
Humidity Control
Even after the paint is dry, high humidity can cause issues like blushing (a white, cloudy haze on the surface). Running a dehumidifier year-round keeps the ambient moisture levels consistent, which protects the bond between the coating and the concrete. This is especially critical in the first 30 days while the coating is reaching its full chemical cure.
When to Call a Professional
While painting a basement floor is a common DIY project, there are some red flags that suggest you need professional intervention. If your floor has large, structural cracks (wider than a nickel), it may indicate settling that a simple paint job won't fix. Furthermore, if you see white, powdery crystals on the concrete—known as efflorescence—it’s a sign of significant mineral deposits being pushed through by water. Professional installers have access to industrial-grade diamond grinders and moisture-vapor barriers that far exceed the capabilities of retail products.
Final Thoughts
Transforming your basement floor is one of the most cost-effective ways to increase the livable square footage of your home. By focusing on the science of the bond rather than just the aesthetics of the color, you can create a durable, clean, and beautiful space. Just remember: the secret isn't in the brush; it’s in the prep.