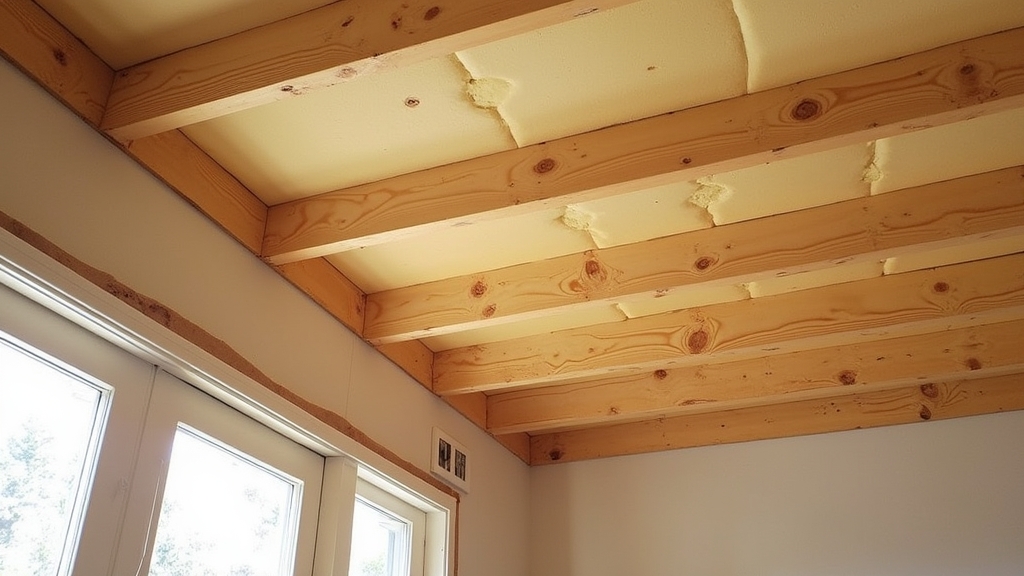
Understanding Your Basement Rim Joists
If you feel a cold draft near your basement ceiling, you are likely feeling the effects of uninsulated rim joists. The rim joist is the perimeter board that sits on top of your foundation wall. It supports the ends of your floor joists. Because this area is part of the home's exterior envelope, it is a major source of air leakage and heat loss. Here is the thing: most older homes use fiberglass batts in this area. Fiberglass does not stop air; it only filters it. To truly improve energy savings, you need a solution that seals and insulates simultaneously.
The Goal: Draft Prevention and Energy Savings
In a typical home, the rim joist area accounts for significant energy waste. Outside air enters through small gaps where the wood meets the foundation. This forces your furnace or heat pump to work harder. By focusing on rim joist insulation, you create an airtight seal that keeps moisture out and conditioned air in. Now, the important part: you aren't just looking for an R-value. You are looking for an air barrier. This is why spray foam and rigid foam boards are the preferred materials over traditional fiberglass.
The DIY Approach: Rigid Foam and Sealant
For many homeowners, the DIY method involves using rigid foam board and canned spray foam. You cut the foam board to fit each joist bay and then seal the edges. It is a labor-intensive process, but it is highly effective when done correctly.
How the DIY Process Works
You start by measuring each individual bay between the floor joists. No two bays are exactly the same size. You cut two-inch thick extruded polystyrene (XPS) or polyisocyanurate foam board to be slightly smaller than the opening. After placing the board against the rim joist, you use a can of expanding spray foam to seal the perimeter. What most people miss is that the seal is more important than the foam board itself. If you leave a gap, air will still find its way into your basement.
Pros of DIY Insulation
- Lower material costs compared to hiring a crew.
- You can work at your own pace, completing a few bays at a time.
- No specialized heavy machinery is required in your home.
- You have total control over the quality of the air seal.
Cons of DIY Insulation
- Extremely time-consuming; a medium-sized basement can take an entire weekend.
- Cutting foam around wires, pipes, and vents is difficult.
- It is physically demanding to work overhead for long periods.
- Canned foam can be messy and difficult to clean if spilled.
The Professional Approach: Closed-Cell Spray Foam
When you hire a professional, they typically use a two-part closed-cell spray foam system. This material expands rapidly to fill every nook and cranny. This is where it gets interesting: the foam acts as an insulator, an air barrier, and a vapor retarder all in one application.
The Professional Installation Process
A professional crew will prep the area by covering your floor and belongings with plastic. They use a high-pressure spray gun to apply the foam directly to the rim joist. The foam expands within seconds, sealing gaps that are impossible to reach by hand. Worth mentioning is that professional-grade spray foam has a higher R-value per inch than most DIY materials.
Pros of Professional Installation
- Speed: A professional can finish an entire basement in a few hours.
- Superior coverage: The foam reaches behind pipes and into tight corners.
- Long-term durability: Closed-cell foam is incredibly rigid and adds structural strength.
- Professional equipment ensures the chemicals are mixed at the correct temperature for a proper cure.
Cons of Professional Installation
- Higher upfront cost due to labor and specialized equipment.
- You usually have to vacate the home for 24 hours during the curing process.
- Overspray can be difficult to remove if the crew isn't careful.
Cost Comparison: DIY vs. Professional
Budget is often the deciding factor for homeowners. The good news is that both options provide a high return on investment through lower utility bills.
- DIY Cost: Expect to spend between $200 and $500 on foam boards, several cans of spray foam, and a high-quality foam gun. Your primary investment is your time.
- Professional Cost: Most contractors have a minimum job fee. For a standard basement rim joist project, prices typically range from $800 to $1,800 depending on the square footage and accessibility.
Best Use Cases: Which Should You Choose?
Deciding between DIY and professional depends on your basement's configuration. On the other hand, your comfort level with home repairs also plays a role.
When to DIY
DIY is best if your rim joists are easily accessible and mostly empty. If you have a square basement with very few pipes or wires running through the joist bays, you can save a lot of money doing it yourself. It is also the better choice if you are on a tight budget and don't mind spending a few days on a ladder.
When to Hire a Professional
Hire a pro if your basement is finished or has complex obstructions. Something to keep in mind: if you have multiple utility penetrations, gas lines, or electrical bundles running along the rim joist, cutting rigid foam around them is a nightmare. A professional with a spray gun can seal these areas in seconds. You should also hire a pro if you need the project done immediately before a cold snap.
Final Recommendation
If you have the patience for precision cutting, the DIY rigid foam method is an excellent eco-friendly choice. It eliminates the need for large-scale chemical spraying and gives you a high-performance seal. However, for most homeowners with complex basements, the professional spray foam route is the most reliable way to ensure total draft prevention and maximum energy savings. Regardless of the method you choose, insulating your rim joists is one of the most impactful upgrades you can make for a more sustainable, comfortable home.