Why Window Well Maintenance Matters
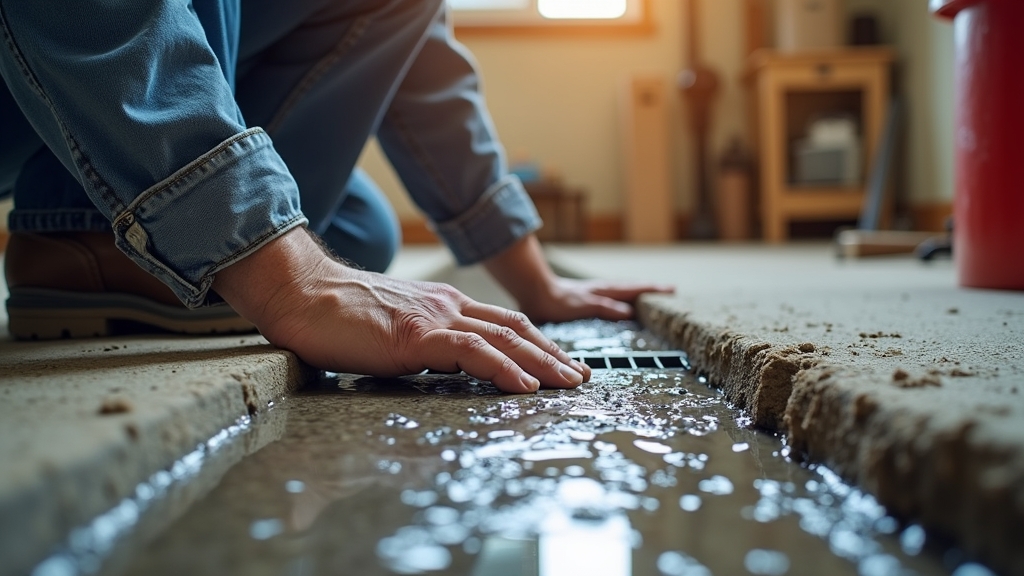
In most homes with basements, window wells are a necessary feature. They allow natural light into lower-level rooms and provide a critical escape route, known as an egress window, in case of emergencies. However, because they are located below ground level, they often become a collection point for everything from autumn leaves to neighborhood trash. Over the years, I have learned that neglecting these small areas is a primary cause of basement water damage.
When a window well fills with debris, it loses its ability to manage water. During a heavy rainstorm, that debris acts like a dam, holding water against your basement window. If the water level rises high enough, it will eventually find a way through the window seal or the frame, leading to expensive interior repairs. What works best is a proactive approach that focuses on keeping the area clear and ensuring the drainage system functions as intended.
Root Causes and Contributing Factors
The real issue usually is not the window well itself, but rather how it interacts with the rest of your home's exterior. To fix the problem, you first have to understand why the well is filling up with water or debris in the first place.
Improper Grading Around the Well
One thing many people overlook is the slope of the land surrounding the window well. If the ground slopes toward the well rather than away from it, the well becomes a funnel for every drop of rain that hits your yard. In my experience, even a slight shift in soil over several seasons can reverse a positive grade, sending runoff directly into the well.
Clogged Gutters and Downspouts
A common situation is a window well located directly beneath a roof valley or a clogged gutter. When gutters overflow, the water falls with significant force, often splashing dirt and mulch into the well and overwhelming the drainage gravel. If your downspouts discharge within three feet of a window well, you are essentially asking for a flood.
Debris Accumulation
Leaves, twigs, and grass clippings are the most frequent offenders. From experience, I have found that organic matter decomposes into a thick, silty sludge at the bottom of the well. This sludge creates a waterproof barrier over your drainage stone, preventing water from reaching the drain tile system buried below.
Immediate Steps: How to Clean Your Window Well
If you notice standing water or a buildup of trash, you need to act quickly. Cleaning a window well is a simple weekend project that requires only a few basic tools: a small shovel or trowel, a shop vacuum, and a bucket.
1. Remove Large Debris
Start by hand-picking large items like sticks, plastic bags, or stones. Use a small trowel to scoop out layers of decayed leaves. Avoid using a full-sized shovel, as you might accidentally strike the window glass or damage the window well liner.
2. Vacuum the Fines
What I have found is that a wet/dry shop vacuum is the most effective tool for removing the fine silt and sand that settles between the rocks. Vacuum the top two inches of gravel to clear out the sediment that prevents water from trickling down.
3. Inspect and Refresh the Gravel
The bottom of your window well should have about 4 to 12 inches of washed gravel or crushed stone. This layer provides a space for water to sit while it waits to drain away. If the gravel is buried in mud, you should remove the top layer and replace it with fresh, clean ¾-inch crushed stone. Do not use sand or pea gravel, as these materials pack too tightly and inhibit drainage.
4. Test the Drain
If your window well has a visible drain pipe that connects to your foundation's weeping tile, check it for obstructions. Slowly pour a bucket of water into the well. The water should disappear almost immediately. If it lingers, the drain line may be collapsed or clogged with roots.
Long-term Prevention Strategies
Cleaning is only half the battle. To keep the area functional, you need to implement prevention strategies that keep water and debris out in the first place.
Install High-Quality Window Well Covers
The key thing to remember is that not all covers are created equal. Many homeowners buy cheap, thin plastic bubbles from big-box stores. These often crack under the weight of snow or turn yellow and brittle in the sun. I recommend investing in custom-fitted polycarbonate covers. These are incredibly strong, often able to support the weight of a person, and they keep out 99% of rain and debris while still letting in light.
Improve Your Landscaping
Consider the area around the well. If you have mulch beds nearby, heavy rain can wash that mulch into the well. Replacing mulch with decorative river rock within a two-foot radius of the window well can significantly reduce the amount of organic material that ends up inside. Additionally, ensure the soil is firmly packed and sloped away from the well at a rate of one inch per foot for at least six feet.
Maintain Your Gutter System
Ensure your gutters are cleaned twice a year. Install downspout extensions to carry water at least five to ten feet away from the foundation. This keeps the soil around your window wells from becoming saturated, which reduces the hydrostatic pressure against your basement walls.
When to Call a Professional
While most cleaning and covering tasks are DIY-friendly, some situations require professional intervention. If you see any of the following, it is time to call a foundation or drainage specialist:
- Separation from the Wall: If the window well liner is pulling away from the foundation, soil will leak in from the sides, and the well may eventually collapse.
- Persistent Standing Water: If the well remains full of water despite a clean layer of gravel, your home's main drainage system (the weeping tile) may be blocked.
- Structural Cracks: If you see cracks in the foundation wall inside the window well, this indicates significant soil pressure or settling that needs professional repair.
- Egress Compliance: If you are installing a cover on an egress window, it must be easily removable from the inside without tools to meet local fire codes. A professional can ensure your cover is both safe and compliant.