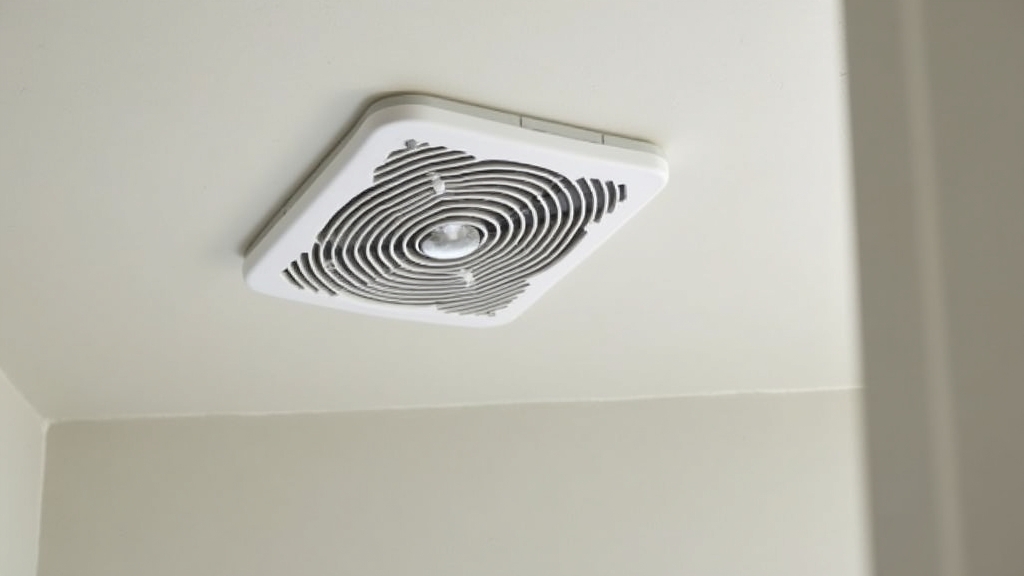
The Real Impact of a Noisy Bathroom Fan
In most homes, the bathroom exhaust fan is an afterthought until it starts sounding like a jet engine taking off every time you flip the switch. From experience, I can tell you that a loud fan isn't just an annoyance; it’s often a sign of a failing motor or a unit that was poorly installed to begin with. More importantly, if a fan is too loud, people tend to leave it off, which leads to the real issue: moisture buildup. Without proper bathroom fan airflow, you are essentially inviting mold and mildew to take up residence in your drywall and grout.
Over the years, I have learned that upgrading a bathroom vent fan is one of the most high-impact DIY projects you can tackle. It improves air quality, preserves your home's structural integrity, and makes your morning routine significantly more peaceful. However, the path you take—whether it's a simple motor swap or a full fixture replacement—depends heavily on your existing setup and your comfort level with basic electrical work.
Understanding Your Upgrade Options
When you decide to tackle a quiet bathroom fan installation, you generally have three routes. Each has a different price point and level of difficulty.
The Motor and Grille Refresh
What I have found is that many homeowners don't realize you can often replace the internal components without touching the housing box in the ceiling. If your current fan belongs to a common series, you can buy a 'refresh kit.' This allows you to snap out the old, dusty motor and snap in a new, quieter one. It’s the path of least resistance because it requires zero drywall cutting and no attic crawling.
The Full Fixture Replacement
A common situation is finding that your old fan housing is too small or incompatible with modern, high-efficiency motors. In this case, you replace the entire unit. This involves disconnecting the old housing from the ceiling joists, disconnecting the ductwork and wiring, and installing a larger, more efficient unit. This is the best way to ensure maximum bathroom fan airflow and the lowest possible 'Sone' rating (the measurement of sound).
The Professional Installation
If you don’t have attic access or if your wiring looks like a bird's nest from 1974, you might consider hiring an electrician or a specialized handyman. While this is the most expensive route, it guarantees that the venting is done correctly—which is where many DIYers fail.
Pros and Cons of DIY vs. Professional
DIY Pros and Cons
Pros: The biggest advantage is cost. You’ll save significantly on labor. Additionally, you get the satisfaction of knowing exactly how your home is put together. You can take the time to seal the housing with foil tape, something a rushed pro might skip.
Cons: One thing many people overlook is the 'attic factor.' If you have to replace the housing, you’ll likely be neck-deep in insulation. There’s also the risk of improper venting. In my experience, I’ve seen countless fans vented directly into the attic rather than through the roof or sidewall, which is a recipe for a rotted roof deck.
Professional Pros and Cons
Pros: Speed and safety. A pro will handle the electrical connections to code and ensure the ductwork is sloped correctly to prevent condensation from dripping back into the motor.
Cons: Expense is the primary drawback. You are also at the mercy of their schedule. Furthermore, some contractors may push for the easiest installation rather than the quietest one.
Realistic Cost Breakdown
The cost to replace a bathroom vent fan varies wildly based on the features you want (like humidity sensors or built-in LED lights) and who is doing the work.
- Refresh Kit (DIY): $50 – $100. This is the budget-friendly way to reduce noise without changing the footprint.
- New High-Performance Fan (Unit Only): $120 – $250. High-end fans with 110 CFM and 0.3 Sones (nearly silent) fall into this bracket.
- Installation Supplies: $30 – $60. Don't forget the cost of 4-inch rigid ducting, foil tape, and perhaps a new roof vent cap.
- Professional Labor: $200 – $500. This depends on whether they are just swapping a unit or running new ductwork.
The key thing to remember is that a 'cheap' fan often costs more in the long run because it fails sooner and doesn't move enough air to prevent bathroom mold.
Best Use Cases for Each Approach
Use a Refresh Kit if: Your bathroom is small, the current housing is in good shape, and you want a 20-minute fix to reduce noise.
Use a Full Replacement (DIY) if: You have clear attic access, your current fan is undersized for the room's square footage, and you are comfortable using a drywall saw and basic wiring nuts.
Call a Professional if: Your bathroom is on the first floor of a two-story home (no attic access), you need to cut a new hole in your roof for venting, or you are upgrading from a fan-only unit to a fan/light/heater combo that requires a new dedicated circuit.
Final Recommendation
Based on my 15 years of tinkering, what works best for most people is a full housing replacement with a high-CFM, low-Sone unit. If you're going to go through the trouble of taking the old one out, do it right. Look for a fan rated for at least 1.0 CFM per square foot of bathroom space. If your bathroom is 80 square feet, get an 80 or 100 CFM fan. Aim for a sound rating of 1.0 Sone or less. This ensures the bathroom mold prevention you need without the headache-inducing noise.
One final tip: Always use 4-inch diameter ducting. Many older homes use 3-inch ducts, which chokes the airflow and makes even the quietest fan sound loud due to air turbulence. Swapping that old flex-duct for rigid 4-inch piping is the single best thing you can do for your fan's performance.