The Reality of Moldy Bathroom Sealant
After 30 years in the trades, I’ve seen more 'failed' bathrooms than I can count. Usually, the homeowner thinks they have a major leak, but here is the thing: nine times out of ten, it’s just a compromised bead of caulk that has turned into a breeding ground for fungi. Moldy bathroom sealant isn’t just an eyesore; it’s a sign that your home’s primary defense against water intrusion has failed. If you ignore it, you aren't just looking at black spots—you're looking at rotted subfloors and structural repairs that cost thousands.
Root Causes: Why Your Caulk is Growing Mold
Most people blame the humidity, but what most people miss is that the root cause is often mechanical or chemical failure before the mold ever shows up. This is where it gets interesting: mold doesn't grow on high-quality silicone; it grows on the soap scum, skin cells, and moisture trapped in the microscopic cracks of failing sealant.
1. Incorrect Product Selection
I still see DIYers using acrylic or 'siliconized' caulk in a shower. Now, the important part: in a wet environment, you must use 100% RTV (Room Temperature Vulcanizing) silicone. Acrylic caulks shrink as they dry, creating tiny craters where water sits. If it doesn't smell like vinegar when you apply it, it's probably the wrong stuff for a bathtub.
2. Structural Movement
Bathtubs are heavy, especially when filled with 40 gallons of water and a human being. This weight causes the tub to settle or flex. If the caulk was applied to an empty tub, that first bath stretches the sealant beyond its elastic limit, creating hairline tears. These tears are the perfect nursery for mold spores.
3. Chemical Stripping
Harsh abrasive cleaners actually create micro-scratches in the sealant surface. Worth mentioning: once you compromise the smooth finish of the silicone, you’ve basically created a 'velcro' surface for organic matter to latch onto.
Immediate Steps: How to Remove Shower Caulk Correctly
Don't just grab a screwdriver and start digging. You’ll scratch the porcelain or the acrylic finish. The good news is that with the right tools, this job is manageable.
Step 1: Soften the Old Sealant
Use a commercial silicone remover or even just a heat gun on a low setting. Softening the bond prevents you from having to use excessive force. Something to keep in mind: if you’re working on a plastic or fiberglass tub, too much heat will melt the finish, so stay moving.
Step 2: The Mechanical Removal
Use a plastic caulk removal tool or a sharp utility knife held at a low angle. Your goal is to get 99% of the material out in long strips. On the other hand, if you leave even a thin film of old silicone, the new bead will not bond. Silicone does not stick to old silicone.
Step 3: The Chemical Kill
After the material is gone, you must kill the microscopic spores left in the substrate. I use a 1:10 bleach-to-water solution or a dedicated mold killer. Scrub the joint with a stiff toothbrush, then—and this is crucial—let it dry for at least 12 to 24 hours. A hair dryer can speed this up, but patience is your best tool here.
Long-Term Prevention: How to Apply Silicone Caulk Like a Pro
To ensure you aren't doing this again in six months, you need to follow the professional's playbook for re-caulking bathtub joints.
The 'Weighted Tub' Trick
This is the secret every veteran contractor knows. Fill the bathtub with water before you apply the caulk. This 'pre-stresses' the joint. Leave the water in the tub until the caulk has fully cured (usually 24 hours). This ensures the silicone is in a neutral state when the tub is under load, rather than being stretched to its breaking point.
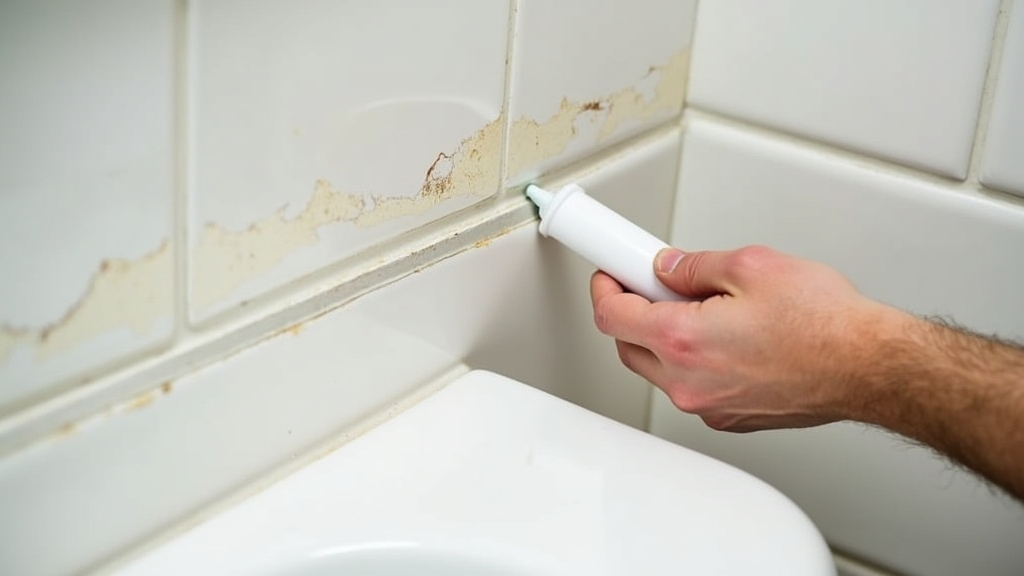
Perfecting the Bead
Cut your nozzle at a 45-degree angle to a width slightly larger than the gap. Now, the important part: pull the gun toward you in a steady motion. Don't push it. To smooth it, skip the fancy plastic tools. Use a gloved finger dipped in a mixture of water and a few drops of Dawn dish soap. The soap prevents the silicone from sticking to your skin and the surrounding tile, leaving a crisp, concave bead.
When to Call a Professional
While replacing moldy bathroom caulk is a standard DIY task, there are red flags that indicate a bigger issue. If you remove the old caulk and find that the drywall or backer board behind it is soft, crumbly, or black, you have a 'behind-the-wall' moisture problem. At that point, a simple bead of silicone is just a Band-Aid on a bullet wound. If the tiles are loose or the floor feels spongy near the tub, call a contractor. You’re likely looking at a structural repair.