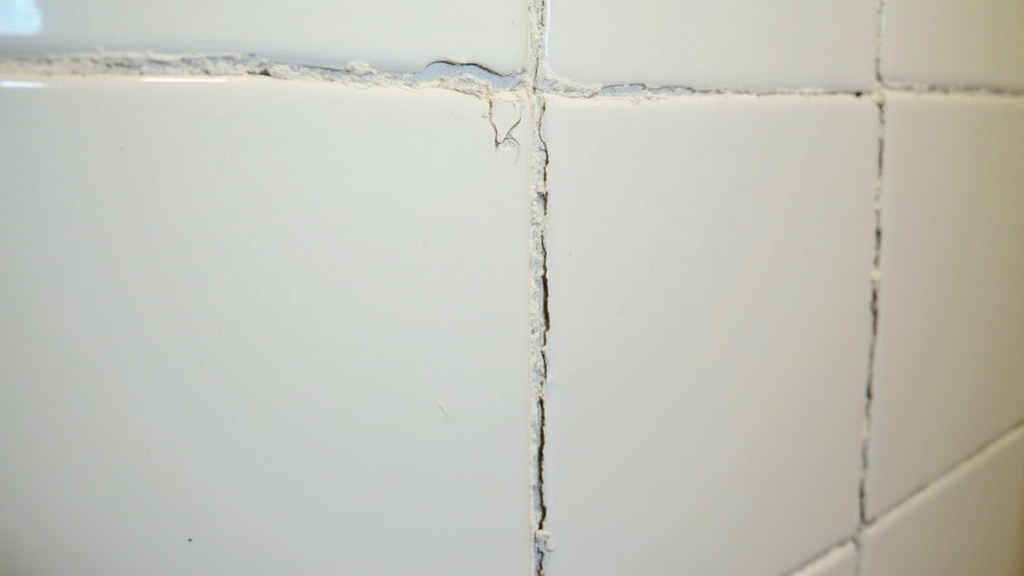
In my 30 years of building homes, I’ve seen homeowners panic over a single cracked bathroom tile. It’s an eyesore, and if left alone, water can seep into the subfloor. Most people think they need to retile the entire room, but that’s rarely the case. You can fix a single tile, but you have to be patient. If you rush, you’ll likely crack the neighboring tiles, turning a one-hour job into a weekend-long headache.
The Two Ways to Approach Cracked Tile Repair
When it comes to fixing broken floor tile, you have two real options: the Surgical Extraction and the Quick Cosmetic Patch. The right choice depends on whether you have a spare tile and how much time you are willing to spend. Take your time with this decision; doing it right the first time saves you money in the long run.
Option 1: The Surgical Extraction (Full Replacement)
This is the gold standard. You remove the damaged tile entirely and install a new one. This method is the only way to ensure the structural integrity of your floor and a perfect aesthetic match. However, it requires you to have a matching spare tile. During my years in the field, I always advised clients to keep at least one full box of tiles from their renovation for this exact reason.
Option 2: The Cosmetic Epoxy Repair
If you don’t have a spare tile and the crack is hairline, you can use a color-matched epoxy or tile repair kit. This doesn't replace the tile; it seals the crack and hides it. While it’s faster, it’s never truly invisible. Trust your instincts on this one—if the tile is shattered or loose, epoxy won't save it.
Detailed Comparison: Pros and Cons
Surgical Extraction Pros and Cons
- Pros: Permanent fix, 100% invisible repair, restores water resistance.
- Cons: Requires a spare tile, involves dusty work, risk of damaging surrounding tiles.
Cosmetic Epoxy Pros and Cons
- Pros: No demolition required, very inexpensive, takes less than 30 minutes.
- Cons: Visible upon close inspection, may yellow over time, doesn't fix structural issues.
Step-by-Step: How to Replace a Tile (The Surgical Method)
If you’ve decided to go with a full replacement, follow these steps carefully. Small details matter here. Do not rush the process of removing the old material.
1. How to Remove Grout Without Damage
The biggest mistake I see is people grabbing a hammer before they clear the grout. You must isolate the broken tile. Use a manual grout saw or a multi-tool with a diamond blade. Carefully grind away the grout around the perimeter of the cracked tile. Go deep enough to reach the backer board. This creates a buffer zone so the vibration of the removal doesn't travel to the good tiles.
2. Breaking and Removing the Tile
Wear safety glasses. Cover the cracked tile with a heavy rag and strike the center with a hammer to break it into smaller pieces. Use a thin masonry chisel to get under the shards. Work from the center outward toward the edges. When you get near the neighboring tiles, slow down. Gently tap the chisel to pop the old pieces up.
3. Preparing the Substrate
Once the tile is out, you'll see a bed of old thin-set mortar. You cannot just glue a new tile on top of this. Use your chisel to scrape the floor flat. You don't need to remove every speck of old mortar, but the new tile must sit at the same height as its neighbors. Vacuum the area thoroughly. Any dust left behind will prevent the new bond from holding.
4. Setting the New Tile
Apply a small amount of thin-set mortar to the back of the new tile (this is called back-buttering). Press it into place. Wiggle it slightly to collapse the ridges of the mortar and ensure full contact. Use a level to make sure it’s flush with the surrounding floor. Wipe away any mortar that squeezed up into the grout lines using a damp sponge.
5. Regrouting
Let the mortar cure for 24 hours. Small details matter here—ensure the grout color matches. Mix a small batch of grout to a peanut butter consistency and pack it into the joints. After 20 minutes, wipe the surface with a barely damp sponge. If the sponge is too wet, you’ll wash the pigment out of the grout.
Cost Comparison
Surgical Extraction: Approximately $15–$30 for a small bag of thin-set and a container of grout, assuming you have the tile. If you need to buy a grout saw, add $10.
Cosmetic Repair: $10–$20 for a high-quality ceramic repair kit.
Best Use Cases for Each Method
Use Surgical Extraction when the tile is in a high-moisture area like a shower floor or right next to a tub. It’s also the best choice for high-traffic areas where an epoxy patch would eventually wear down. It is worth doing right the first time in these locations.
Use Cosmetic Repair for tiles in dry areas, like behind a toilet or inside a linen closet, or if the tile is an obsolete pattern that is impossible to find. It’s also a good temporary fix if you plan on replacing the entire floor within a year or two.
Final Recommendation
In my experience, if you have the spare tile, always choose the replacement method. A bathroom is a wet environment, and a crack is an invitation for mold to grow beneath your floor. If you are nervous about the work, just remember to go slow. Most mistakes happen when a DIYer tries to finish the job in twenty minutes. Take your time, clear that grout line completely, and you’ll have a repair that lasts as long as the house.