Mastering the Small Fix: Why Single Shingle Replacement Matters
Here is the thing: most homeowners assume a small drip in the attic necessitates a five-figure roof replacement. In reality, a localized roof leak repair often comes down to one or two compromised asphalt shingles. Learning to swap these out yourself not only saves thousands in labor costs but also prevents structural rot that occurs when water bypasses the primary barrier. This guide will walk you through the precise mechanics of shingle replacement, tailored to the specific challenges presented by the changing seasons.
The Seasonal Calendar for Roof Maintenance
Timing your repair is just as critical as the repair itself. Asphalt-based materials react dynamically to temperature, meaning the way you handle a shingle in July differs significantly from a January emergency fix.
Spring: The Assessment Phase
Spring is the ideal time for a thorough inspection. After winter ice dams and heavy snow loads, shingles may be cracked or missing granules. The good news is that mild spring temperatures make shingles pliable without being overly soft. This is the window where you can easily break the adhesive seals without snapping the material.
Summer: Dealing with Thermal Expansion
Summer presents a unique challenge. In high heat, asphalt becomes 'gummy.' What most people miss is that walking on a hot roof can actually cause more damage by scuffing the protective granules off healthy shingles. If you must do a repair in summer, aim for the early morning hours before the sun hits the roof surface. On the other hand, the heat is your friend for ensuring the new shingle’s sealant strip bonds quickly to the existing roof.
Fall: Pre-Winter Preparation
Fall is your last chance to ensure the roof is watertight before the freeze-thaw cycle begins. Something to keep in mind is that as temperatures drop below 50°F, the self-sealing strips on new shingles may not activate. If you are doing a late-season repair, you will likely need to apply manual dabs of roofing cement to ensure wind-uplift protection.
Winter: Emergency Cold-Weather Repairs
Winter repairs are difficult because shingles become brittle and prone to cracking like glass. If a shingle is missing and a leak is active, you must act, but you’ll need to keep your replacement shingles in a heated garage until the very moment you climb the ladder. This is where it gets interesting: you may need a heat gun to gently warm the surrounding shingles just enough to lift them without shattering the edges.
Essential Tools and Materials
Before climbing up, ensure you have the following professional-grade supplies:
- Replacement asphalt shingles (matched to your current roof's weight and color)
- Roofing nails (1 ¼ inch galvanized steel)
- Flat bar (also known as a pry bar or 'roofer's helper')
- Hammer
- Utility knife
- Tube of roofing sealant or asphalt plastic cement
- Caulking gun
Step-by-Step Guide to Replacing a Damaged Shingle
Step 1: Breaking the Seal
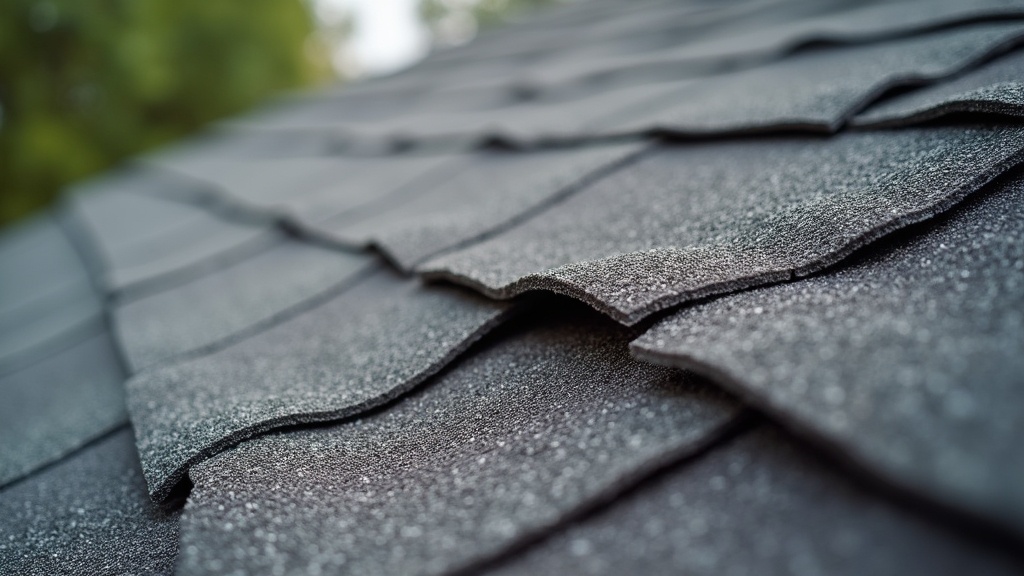
Now, the important part: you aren't just replacing one shingle; you are interacting with three rows. Use your flat bar to gently slide under the shingle directly above the damaged one. You need to break the factory sealant bond. Work slowly to avoid tearing the overlapping shingle. Repeat this for the damaged shingle itself.
Step 2: Locating and Removing Nails
Each shingle is typically held by four to six roofing nails. However, those nails also pass through the top of the shingle below it. Slide your flat bar under the damaged shingle to locate the nails. Gently pry them upward. Once the nail head pops up about half an inch, remove the bar and pull the nail out from the top. You will need to do this for the row above as well, as those nails are likely piercing the 'top lap' of your target shingle.
Step 3: Removing the Damaged Piece
Once all nails are clear, the damaged shingle should slide out easily. Worth mentioning: if it feels stuck, do not yank it. There is likely a hidden nail near the end or a stubborn bit of sealant. Check again with the flat bar.
Step 4: Installing the New Shingle
Slide the new shingle into the gap. Ensure it is aligned perfectly with the shingles on either side to maintain the integrity of the water-shedding pattern. This is where precision matters; if the shingle is crooked, water will 'wick' sideways into the nail holes.
Step 5: Nailing and Final Sealing
Drive new roofing nails into the designated nail line (usually marked by a printed stripe on the shingle). Avoid the exact holes left by the old nails; instead, offset them by about half an inch. Finally, apply a nickel-sized dab of sealant under the tabs of the new shingle and the shingle above it to ensure a wind-proof bond.
Practical Tips from the Field
When searching for matching shingles, look for a manufacturer's name on the underside of a damaged piece or check your attic for leftovers from the original build. If the roof is aged, the new shingle will look darker. This is normal. Over six months of UV exposure, it will begin to blend in. Additionally, always check the underlayment (the felt paper) while the shingle is removed. If the paper is torn, apply a small patch of flashing cement before laying the new shingle.
Common Mistakes to Avoid
- High Nailing: Placing nails too high on the shingle prevents them from catching the top of the shingle below, reducing wind resistance.
- Over-Driven Nails: If you hammer too hard, the nail head will cut through the shingle, making it useless in a storm.
- Ignoring the Temperature: Trying to bend shingles in sub-freezing weather will result in immediate cracking.
- Reuse of Old Nails: Always use fresh, galvanized nails to prevent rust-jacking.


