Understanding the Importance of Water Heater Maintenance
As an energy efficiency advisor, I often see homeowners overlook one of the most hardworking appliances in their house: the water heater. Whether you have a traditional hot water tank or a modern hybrid system, regular maintenance is the difference between a unit that lasts twelve years and one that fails in six. Neglect leads to sediment buildup, which acts as an insulator between the burner and the water, forcing your heater to work harder and driving up your utility bills. Proper water heater maintenance ensures safety, maximizes energy efficiency, and prevents the catastrophic mess of a ruptured tank.
The DIY Approach: What You Can Handle Safely
Many aspects of water heater maintenance are well within the reach of a handy homeowner. Taking a proactive stance on these small tasks can save you a significant amount in service fees over the life of the unit.
Flushing the Tank
The most critical DIY task is flushing the sediment out of the tank. Over time, minerals like calcium and magnesium settle at the bottom. To do this, turn off the power (at the breaker for electric) or set the gas valve to 'pilot.' Attach a garden hose to the drain valve at the base of the tank and run the other end to a floor drain or outside. Open the valve and let the water run until it is clear. This simple act prevents the 'popping' noise often heard in older heaters and keeps the heat transfer efficient.
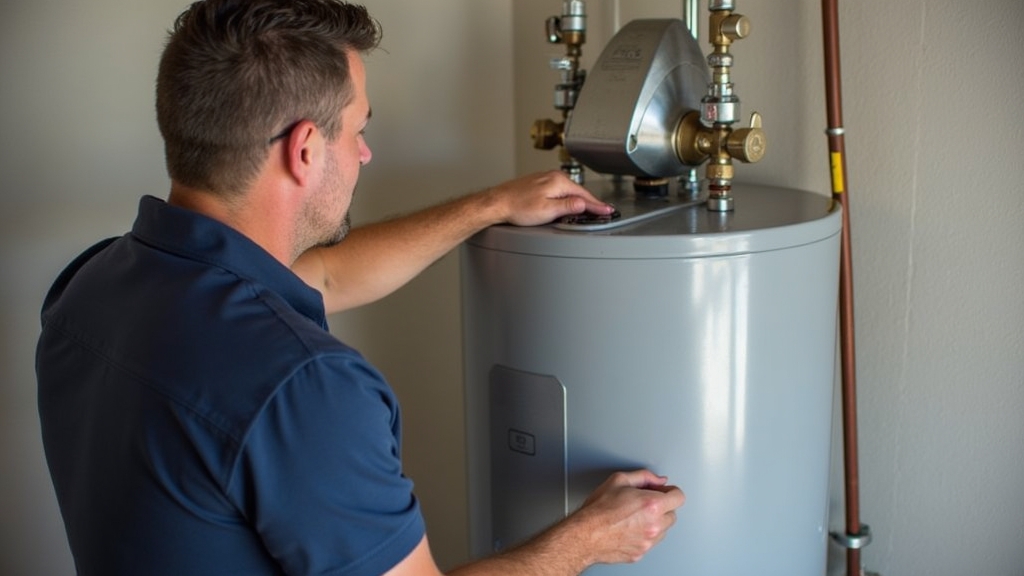
Testing the Temperature and Pressure (T&P) Relief Valve
Safety is paramount. The T&P valve is designed to open if the internal pressure or temperature exceeds safe limits. You can test this by lifting the lever slightly to allow a small amount of water to discharge into the overflow pipe. If no water comes out, or if it continues to leak after you close it, the valve is faulty and needs immediate attention. Testing this twice a year ensures your hot water tank won't become a safety hazard.
Insulating the Pipes and Tank
Reducing 'standby heat loss' is a low-effort, high-reward DIY project. Wrapping the first six feet of cold and hot water pipes with foam insulation sleeves prevents heat from dissipating as the water travels to your faucets. If you have an older tank that feels warm to the touch, adding an insulating blanket (specifically designed for water heaters) can further improve efficiency, though you must be careful not to block air intakes or exhaust vents on gas models.
The Professional Path: When to Call an Expert
While DIY tasks cover the basics, certain technical components require specialized tools and diagnostic knowledge. Attempting these without experience can lead to gas leaks, electrical shorts, or voided warranties.
Anode Rod Inspection and Replacement
The anode rod is a sacrificial piece of metal that attracts corrosive elements in the water, rusting so your tank doesn't have to. Checking this rod involves unscrewing a large hex head on top of the tank, which often requires a heavy-duty impact wrench and significant leverage. If the rod is depleted, the tank begins to rust internally. A professional can safely swap this rod every three to five years, which is the single most effective way to double the lifespan of your unit.
Gas Component Calibration
For gas water heaters, the burner assembly, thermocouple, and venting system need periodic inspection. A professional technician will check for proper flame color (it should be blue, not yellow), ensure the exhaust flue is drafting correctly to prevent carbon monoxide buildup, and clean the burner of any debris. These are precision tasks that involve combustion safety, making them unsuitable for most DIYers.
Electrical Component Testing
Electric water heaters use upper and lower heating elements controlled by thermostats. If you find yourself running out of hot water quickly, one element may have burned out. A pro uses a multimeter to test for continuity and can replace these high-voltage components without the risk of electrical shock or improper wiring that could lead to a fire.
Detailed Pros and Cons
DIY Maintenance
- Pros: Zero labor costs; flexible scheduling; increases your personal knowledge of home systems.
- Cons: Risk of improper drainage; potential for minor leaks if valves don't seat correctly; time-consuming for beginners.
Professional Maintenance
- Pros: Comprehensive safety checks; specialized tools for stuck valves or rods; documented service history (important for warranties).
- Cons: Service call fees (typically $100-$250); requires taking time off to meet the technician.
Cost Comparison and Value Analysis
Maintaining a water heater is far cheaper than replacing one. A DIY flush costs essentially $0 if you already own a garden hose. A professional maintenance visit generally ranges from $150 to $300 depending on your location and the scope of work. However, consider the 'replacement cost' metric. A new hot water tank, including installation and disposal of the old unit, often costs between $1,200 and $2,500. Spending $200 every few years for a professional to ensure the anode rod is healthy and the gas lines are sealed is a minor investment that protects a multi-thousand-dollar asset.
Best Use Cases for Each Option
Choose DIY if: Your unit is less than five years old, you are comfortable using basic hand tools, and you are performing routine tasks like flushing sediment or adjusting the temperature settings (ideally to 120°F for energy savings).
Choose a Professional if: You smell gas, see signs of heavy corrosion around the base of the tank, hear loud banging noises that don't go away after a flush, or if your unit is more than six years old and the anode rod has never been checked. Additionally, if your water heater is located in an attic or a finished living space, the risk of a DIY mistake causing water damage is too high; call an expert.
Final Recommendation: The Hybrid Strategy
The most effective strategy for the average homeowner is a hybrid approach. Perform a DIY flush and T&P valve test once every six months to keep sediment at bay. Then, every three years, hire a professional to perform a deep-dive inspection, replace the anode rod, and check the combustion or electrical systems. This balance keeps your costs low while ensuring the technical safety milestones are met by a qualified expert. By staying on top of water heater maintenance, you’ll enjoy lower energy bills, consistent water temperatures, and the peace of mind that comes from knowing your home is running efficiently.


