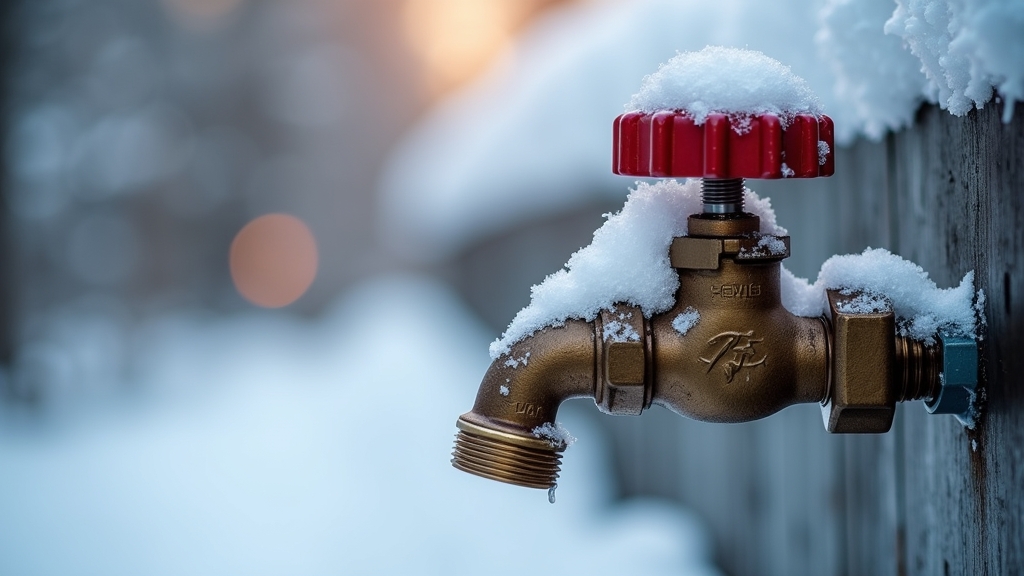
Why Winterizing Your Hose Bibb is Non-Negotiable
In my years of consulting, I have seen the same scene too many times: a homeowner discovers a flooded basement or a ruined drywall ceiling in the spring, all because of a single outdoor faucet left unprotected. When water freezes, it expands by approximately 9%. This expansion creates immense pressure inside your copper or PEX pipes. Even if the faucet itself doesn't crack, the pressure can force a split in the pipe deep inside your wall. By the time you turn the water back on in April, you have a major renovation project on your hands. Taking the time to winterize your outdoor spigots—often called hose bibbs—is a small investment of effort that saves thousands in repair costs.
Tools and Materials Needed for Freeze Protection
You do not need a professional plumber's kit for this task. Most of these items are likely already in your garage or under the kitchen sink. Having everything ready before you start ensures you won't get distracted halfway through the process.
- Adjustable wrench or pliers: Useful if your garden hose is screwed on too tightly to remove by hand.
- Insulated faucet covers: These are typically hard foam shells or soft, quilted pouches with a drawstring.
- A small bucket: To catch the residual water when draining the line.
- Dry towels: To wipe down the fixture and clean up any spills.
- Pipe insulation sleeves (optional): For any exposed piping in unheated crawlspaces or basements.
Preparation Steps: Inspection First
Before the first frost hits, walk around your home's perimeter and inspect every exterior water outlet. Trust your instincts on this one—if a faucet has been dripping all summer, it is worth fixing that leak before you winterize it. A slow drip can cause ice to build up inside the faucet cover, rendering the insulation useless. Check for cracks in the handle and ensure the mounting plate (the flange) is securely attached to the siding. If it's loose, cold air can seep into your wall cavity, which is exactly what we want to avoid.
Detailed Step-by-Step Instructions
Step 1: Disconnect and Drain Garden Hoses
This is the most common mistake I see. People leave their hoses attached, thinking the faucet is 'off' so it's safe. However, a hose full of water acts like a plug. It traps water inside the faucet's body. When that water freezes, it has nowhere to expand but inward, toward the house. Disconnect every hose, drain them completely by walking the length of the hose to force water out, and store them in a shed or garage. Also, remove any splitters, timers, or irrigation attachments.
Step 2: Locate the Interior Shut-Off Valve
Most modern homes built in colder climates have a dedicated shut-off valve for each outdoor faucet. These are usually located in the basement, crawlspace, or utility closet, directly opposite where the spigot sits on the exterior wall. Look for a small handle (either a lever or a round wheel). Turn it clockwise until it stops. If the valve is old, take your time with this; don't force it with a wrench if it's stuck, as you could snap the stem. A gentle, firm turn is usually enough.
Step 3: Drain the Residual Water
Once the interior valve is closed, go back outside and open the exterior faucet all the way. You will see a small amount of water trickle out—this is the 'trapped' water between the interior shut-off and the exterior spigot. Leave the faucet handle in the 'open' position throughout the winter. This allows for air expansion if any moisture remains.
Step 4: Use the Bleeder Cap (If Applicable)
Look back at your interior shut-off valve. Many feature a 'bleeder cap'—a tiny metal nut on the side of the valve body. Place your bucket under the valve and unscrew this cap. This releases the vacuum seal and allows the remaining water in the pipe to drain out completely. It is a small detail that matters immensely. Once the water stops dripping, screw the cap back on hand-tight.
Step 5: Install the Faucet Cover
The final layer of freeze protection is the faucet cover. These covers work by trapping the heat that naturally radiates from the inside of your house through the pipe. Slide the loop of the cover over the faucet handle, push the cover flush against the house siding, and tighten the slide lock or drawstring. Make sure there are no gaps where cold wind can enter.
Tips for Best Results
It is worth doing right the first time to ensure peace of mind during a deep freeze. If you have a 'frost-proof' hose bibb (a long-stemmed faucet where the actual valve is located 12 inches inside the house), you still need to disconnect the hose. The frost-proof design only works if the water can drain out. If the hose stays on, the water stays in, and the pipe will burst regardless of the faucet type. Also, if you have exposed pipes in an unheated basement, consider wrapping them in foam sleeves. The more layers of protection you have, the less you have to worry when the temperature drops below zero.
Troubleshooting Common Issues
What if I don't have an interior shut-off valve?
In some older homes or warmer climates that experience occasional freezes, there may not be an interior valve. In this case, your primary defense is insulation. Wrap the faucet in extra layers of rags or specialized pipe wrap before putting on the faucet cover. You may also want to consider hiring a professional to install a shut-off valve for future winters.
The interior valve is leaking after I turned it.
If you see water weeping from the stem of the shut-off valve after turning it, the packing nut may be loose. Give it a very slight turn (1/8th of a turn) with a wrench to see if it stops. If it continues to leak, the internal washer may have failed, and the valve should be replaced by a professional.
The faucet cover won't fit over my decorative spigot.
If you have an oversized or decorative handle, standard foam covers might not fit. Use an insulated 'sock' style cover instead. These are flexible and can be wrapped around awkwardly shaped fixtures, then secured with heavy-duty tape or the provided straps.


