The Reality of Owning Marble Countertops
In my ten years of visiting homes, I have seen hundreds of beautiful marble kitchens. I have also seen the heartbreak of a red wine ring on a $5,000 slab of Carrara. Here is the thing: marble is a metamorphic rock, which is a fancy way of saying it is basically a hard sponge. It is full of microscopic pores that soak up liquids. If those liquids have color—like coffee, wine, or oil—they will leave a permanent mark.
Now, the important part to understand is that sealing does not make your marble bulletproof. It doesn't stop 'etching,' which is the dulling of the surface caused by acidic liquids like lemon juice. However, a good marble countertop sealer buys you time. Instead of a spill soaking in immediately, it beads up on the surface, giving you a chance to wipe it away. In this guide, I will break down how to do it yourself, what it costs, and when you should actually call a pro.
The Two Types of Marble Sealer
Before you spend a dime, you need to know what you are buying. Not all sealers are created equal. In the trade, we generally group them into two categories.
Penetrating (Impregnating) Sealers
This is what I recommend for 95% of residential kitchens. These sealers sink into the stone and clog the pores from the inside out. They don't change the look of the marble or make it look 'plastic.' Most high-quality solvent-based sealers fall into this category. They are excellent for preventing stains but offer zero protection against acid etching.
Topical Sealers (Coatings)
These sit on top of the stone like a layer of wax or polyurethane. This is where it gets interesting: topical sealers can actually prevent etching because they create a physical barrier between the acid and the stone. On the other hand, they tend to look a bit unnatural, can peel over time, and require more maintenance. I usually only suggest these for high-traffic commercial bars.
DIY vs. Professional: Realistic Cost Analysis
What most people miss is that the cost of sealing marble isn't just the bottle of liquid. It’s the prep work and the risk factor. Here is how the numbers usually shake out.
The DIY Route
The good news is that sealing marble is one of the easiest DIY projects you can tackle. You don't need heavy machinery or specialized training.
- High-quality Impregnating Sealer: $30 - $60 per quart (covers about 100-150 sq. ft.).
- Microfiber Cloths: $10.
- Stone Cleaner: $15.
- Your Time: 2 to 4 hours (including drying time).
- Total DIY Cost: $55 - $85.
The Professional Service
If you have a massive kitchen or you are nervous about streaks, you might hire a stone restoration specialist. Worth mentioning is that most pros won't come out just to seal; they usually bundle it with a deep clean or a polish.
- Service Fee: $250 - $500 (depending on square footage).
- Included: Professional-grade solvent sealers, mechanical buffing, and a warranty.
- Total Professional Cost: $300 - $600+.
How to Seal Marble Like a Pro: Step-by-Step
If you decide to do it yourself, follow these steps exactly. I've seen DIY jobs go wrong because people rushed the drying phase.
1. The Water Test
First, determine if you even need to seal. Place a few drops of water on different areas of the counter. Wait 10 minutes. If the water beads up, your current seal is fine. If the stone has darkened or the water has soaked in, it is time to reseal.
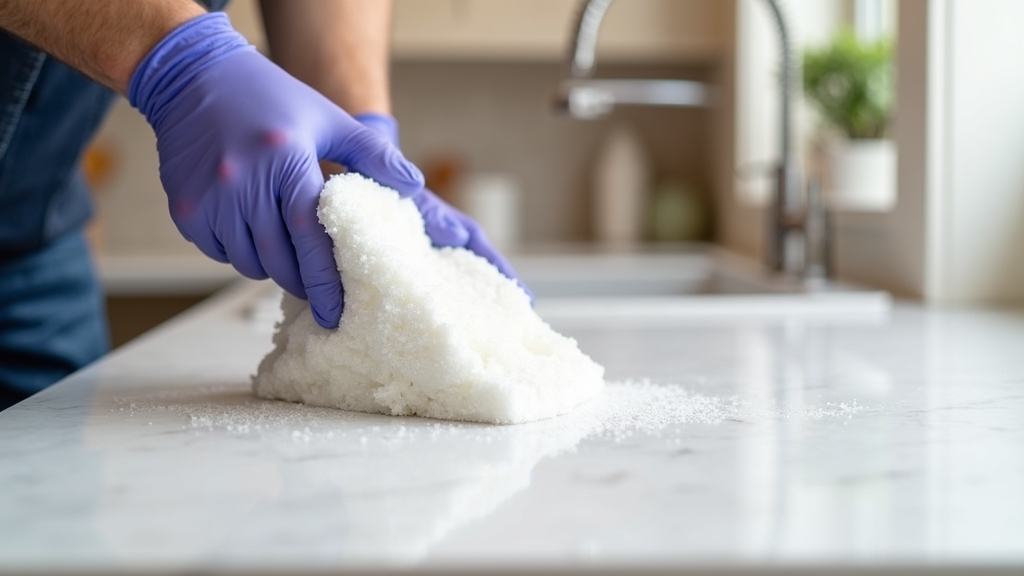
2. Clean the Surface Thoroughly
You cannot seal over dirt. Use a pH-neutral stone cleaner. Avoid Windex or anything with vinegar. Wipe the counters down and let them dry for at least 24 hours. Something to keep in mind: if there is moisture trapped in the stone, the sealer won't bond properly and may cause a cloudy haze.
3. Apply the Sealer
Pour the sealer into a small bowl. Dip a clean, lint-free microfiber cloth or a foam brush into the sealer. Work in small sections, about 3 feet by 3 feet. Apply the sealer in a circular motion, ensuring the stone looks 'wet' but not flooded.
4. Let it Dwell
Allow the sealer to sit on the surface for about 10 to 15 minutes. This gives it time to penetrate those microscopic pores. Do not let it dry completely on the surface.
5. Buff Away the Excess
This is the most critical step. Take a fresh, dry microfiber cloth and buff the area until it is completely dry. If you leave excess sealer to dry on top of the marble, it will leave a sticky, streaky residue that is a nightmare to remove later.
6. Repeat (Optional)
For very porous white marbles, I often suggest a second coat. Wait about 30 minutes after the first buffing, then repeat steps 3 through 5.
Pros and Cons of DIY Sealing
Every maintenance task has trade-offs. Here is the honest breakdown for the homeowner.
Pros:
- Cost Savings: You save hundreds of dollars in labor.
- Convenience: You can do it on a Sunday afternoon without waiting for a contractor.
- Knowledge: You learn exactly how your stone reacts to liquids.
Cons:
- Physical Labor: It involves a lot of kneeling and circular buffing motions.
- User Error: If you don't buff off the excess, the streaks are hard to clean.
- Fumes: Solvent-based sealers have a very strong smell. You must ventilate the room.
Final Recommendation: Which Path Should You Take?
If your marble is in good shape and you just want to prevent stains, **go the DIY route.** It is simple, affordable, and highly effective. Buy a high-quality solvent-based impregnating sealer like Tenax or Miracle Sealants. It is worth the extra $20 over the hardware store brand.
On the other hand, if your marble is already covered in dull etch marks or deep scratches, a sealer won't fix that. In that case, **hire a professional** to diamond-hone the surface back to its original finish. They will seal it as part of the process, and your counters will look brand new.