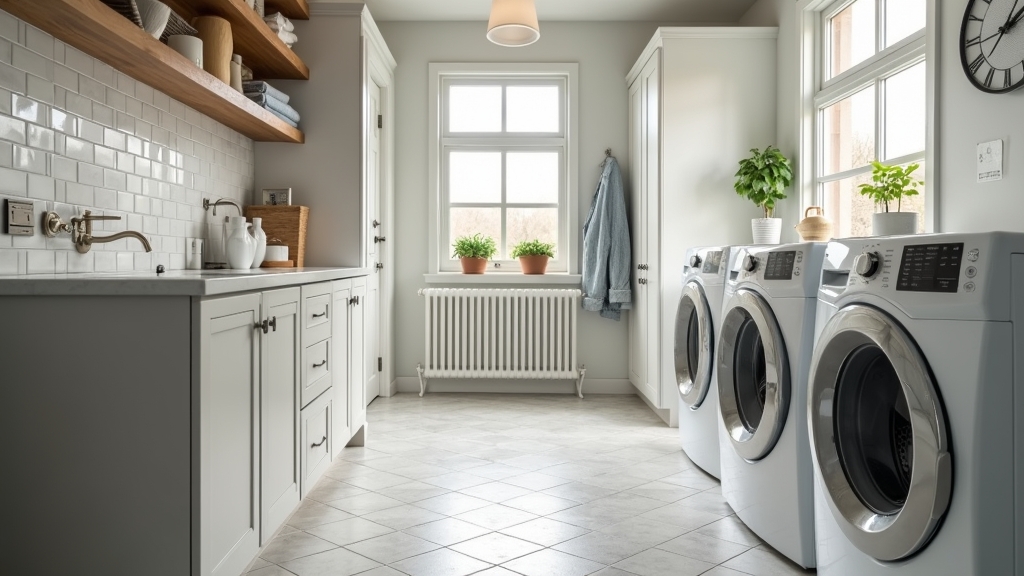
Overview of Indoor Air Drying Systems
After three decades in the construction industry, I have seen laundry rooms evolve from afterthoughts in dark basements to high-efficiency hubs of the home. One element that remains essential, regardless of the era, is a reliable system for air drying clothes. Whether you are looking to preserve delicate fabrics or reduce energy consumption, selecting the right indoor drying rack requires an understanding of both physics and structural integrity. In this guide, we will explore the nuances of choosing a system that fits your space and, more importantly, how to install it so it stays on the wall for the next twenty years.
The Importance of Structural Support
The biggest mistake I’ve seen homeowners make is underestimating the weight of wet laundry. Water is heavy; a single load of towels can weigh three times more when wet than when dry. When you apply that weight to a wall-mounted drying rack, you aren't just dealing with vertical force; you are dealing with leverage. Taking your time with the planning phase ensures you don't end up with a pile of clothes and a ruined piece of drywall on the floor.
Tools and Materials Needed
Before you begin the installation of a permanent or wall-mounted system, gather the following tools. It is worth doing right the first time, so avoid shortcuts with makeshift equipment.
- Electronic Stud Finder: Essential for locating the structural framing behind your drywall.
- Power Drill and Driver Bits: For creating pilot holes and securing fasteners.
- Level (2-foot minimum): To ensure the rack is perfectly horizontal, preventing clothes from sliding to one side.
- Stainless Steel Screws: Use #8 or #10 screws, at least 2.5 inches long, to ensure deep penetration into the studs.
- Heavy-Duty Toggle Bolts: Only if a stud is absolutely unavailable in a specific location.
- Measuring Tape and Pencil: For precise layout.
Preparation Steps
1. Assessing Airflow and Humidity
Air drying clothes relies on evaporation. If you place a drying rack in a closet with no ventilation, you are inviting mold and mildew. Small details matter here: look for a spot near a window, a HVAC vent, or under a ceiling fan. Trust your instincts on this one—if a room feels damp, it isn't the right place for a rack.
2. Mapping the Wall
Use your stud finder to mark the edges of the vertical studs in your laundry room. In most modern homes, these are spaced 16 inches apart on center. Mark these locations clearly with a pencil. If your rack's mounting holes don't align with your studs, you may need to mount a 'header'—a piece of finished 1x4 lumber—to the studs first, then mount the rack to that board.
Detailed Step-by-Step Instructions
Step 1: Determine the Ideal Height
The height of the rack should be a balance between accessibility and utility. For floor-standing models, this is a non-issue, but for wall-mounted or ceiling-hung systems, you want the highest point to be reachable without a stool, while ensuring long items like trousers or dresses won't touch the floor. Generally, a mounting height of 60 to 70 inches is standard.
Step 2: Level and Mark
Hold the rack (or its mounting bracket) against the wall at your chosen height. Place your level on top. Do not rush the process; even a fraction of an inch off-level will be noticeable once the rack is extended. Mark the center of each mounting hole onto the wall.
Step 3: Drill Pilot Holes
Never drive a screw directly into a stud without a pilot hole. A pilot hole prevents the wood from splitting, which would significantly weaken the hold. Use a drill bit slightly smaller than the diameter of your screw's shank.
Step 4: Secure the Hardware
Align the rack with your pilot holes and drive the stainless steel screws home. If you are using a wall-mounted accordion-style rack, ensure the screws are flush against the bracket. If you must use anchors because a stud isn't available, use toggle bolts rather than plastic expansion anchors. Plastic anchors will eventually pull out under the weight of wet denim.
Step 5: Testing the Load
Once installed, extend the rack fully. Apply gentle downward pressure to test the stability. It should feel rigid. If there is any 'give' or if you hear the drywall crunching, stop immediately and reassess your mounting points.
Common Mistakes to Avoid
Mistake 1: Ignoring Material Composition
In a laundry room, humidity is constant. I've seen many beautiful wooden racks warp or develop mold because they weren't properly sealed. If you prefer wood, ensure it is a moisture-resistant species like teak or cedar, or that it has a high-quality marine-grade finish. For metal racks, stainless steel or powder-coated aluminum is the gold standard to prevent rust spots on your white shirts.
Mistake 2: Overloading the Rack
Every rack has a weight limit. Distribute the weight evenly. Placing all the heavy items on the outer edge of a folding rack creates a lever effect that puts immense strain on the wall fasteners. Place heavier items closer to the wall and lighter items further out.
Mistake 3: Poor Spacing for Airflow
If you crowd clothes too closely together, they won't dry efficiently. This leads to a 'musty' smell. Leave at least an inch of space between garments to allow air to circulate freely.
Tips for Best Results
- Pre-Dry in the Machine: A quick 5-minute spin in the dryer can remove excess moisture and lint before hanging, making the air-drying process faster.
- Use Hangers: For shirts and blouses, hanging them on hangers and then hooking the hangers onto the drying rack can triple your drying capacity and reduce wrinkles.
- Clean the Bars: Periodically wipe down the bars of your rack with a damp cloth. Dust and detergent residue can build up and transfer to your clean clothes.
Troubleshooting Common Issues
The Rack is Sagging
If a wall-mounted rack begins to sag, the fasteners are likely pulling out of the substrate. This usually happens when the rack was mounted into drywall only. You must move the rack to align with studs or install a backer board that is securely tied into the home's framing.
Clothes Take Too Long to Dry
This is usually an airflow issue. Try opening a window or using a small floor fan directed at the rack. If the room is particularly cold, the air cannot hold as much moisture, which slows evaporation. Increasing the room temperature slightly can help.
Rust Spots on Clothing
This occurs when the protective coating on a metal rack is chipped. You can temporarily fix this by covering the affected area with clear nail polish, but eventually, the rack should be replaced with a high-quality stainless steel model.