Mastering the Art of the Shelfie
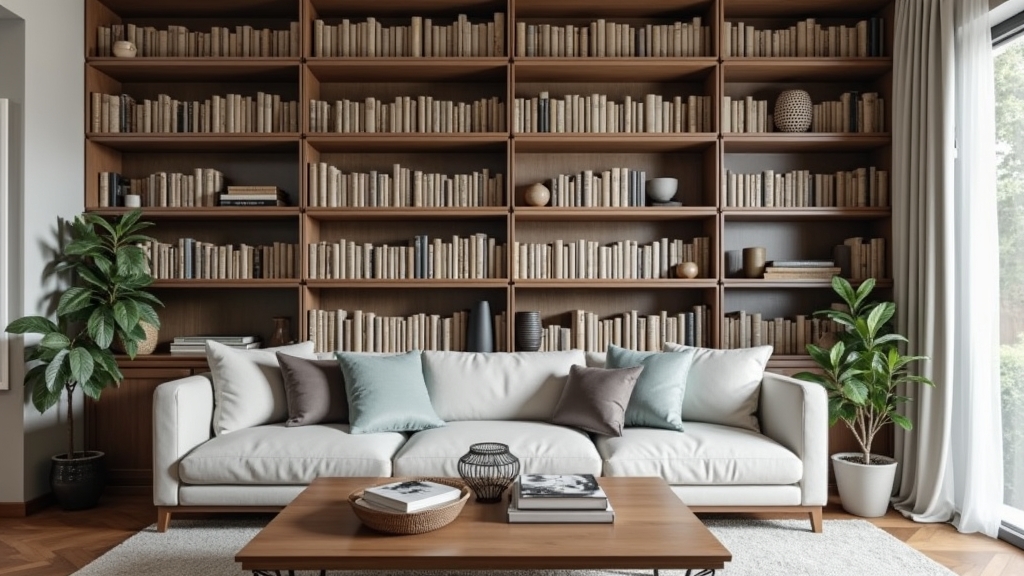
In most homes, a bookshelf is treated as a catch-all for clutter, old bills, and paperbacks that haven't been touched in a decade. But from experience, I can tell you that a well-styled bookshelf is one of the most powerful design elements in a living room. It’s the difference between a room that feels 'finished' and one that feels like a construction zone.
Over the years, I’ve built hundreds of custom built-ins, and what I have found is that even the most expensive carpentry looks cheap if it’s styled poorly. This guide isn't about just putting books on a shelf; it's about architectural balance, visual weight, and storytelling. We’re going to turn your cluttered units into a professional 'shelfie' using the same principles I’ve seen work in high-end model homes for 30 years.
The Tools and Materials You’ll Need
You don't need a hammer for this job, but you do need the right components to build the look. Before you start, gather these essentials:
- Books: A mix of hardcovers (with and without jackets) and larger coffee table books.
- Trays and Boxes: These help corral smaller items and add height.
- Organic Elements: Plants (pothos or succulents work great), driftwood, or stones.
- Art and Photos: Small framed pieces or even leaning canvases.
- Objects of Interest: Vases, sculptures, or vintage tools.
- A Microfiber Cloth: To clean the shelves thoroughly before you start.
Preparation: The Clean Slate Method
The real issue usually is that people try to style around existing clutter. One thing many people overlook is the power of a total reset. You cannot see the potential of the space if it’s half-full of old junk.
Step 1: Empty Everything
Take every single item off the shelves. Put them on a large table or the floor so you can see your entire inventory. This is the best time to donate books you'll never read again.
Step 2: Clean and Inspect
In my experience, bookshelves are dust magnets. Wipe down every surface. If you have adjustable shelves, now is the time to ensure they are level. Nothing ruins a high-end look faster than a shelf that’s sagging or tilted by an eighth of an inch.
Detailed Step-by-Step Styling Instructions
Styling is a layer-by-layer process. What works best is building from the largest items down to the smallest details.
Step 3: Establish the Anchors
Start with your largest books and heaviest objects. A common situation is placing all the heavy items at the bottom, but this can make the unit look bottom-heavy. Distribute larger items in a 'zigzag' pattern across the shelves to lead the eye through the display.
Step 4: The Rule of Thirds and Triangles
The key thing to remember is the 'Triangle Principle.' If you place a brass object on the top left, place another brass element on the middle right, and a third on the bottom left. This creates a visual triangle that feels harmonious to the brain.
Step 5: Horizontal vs. Vertical Books
Don't just line books up like a library. Over the years, I have learned that mixing orientations adds necessary texture. Stand some books up (using a heavy object as a bookend) and stack others horizontally to serve as a pedestal for a small decorative object.
Step 6: Layering Art and Greenery
Lean a piece of art against the back of the shelf. It adds depth and covers the 'dead space' at the rear. Follow this with a plant—life and movement are essential. I always recommend a 'spiller' (a plant that hangs over the edge) to break up the hard horizontal lines of the shelving.
Tips for Best Results: The Contractor’s Secrets
- Color Coding (With Caution): You don't have to rainbow-order your books, but grouping by spine color creates a cleaner, more intentional look.
- Remove the Jackets: If your hardcovers have gaudy or torn paper jackets, take them off. Often, the linen texture underneath looks far more expensive.
- Leave Negative Space: One thing many people overlook is 'white space.' You don't need to fill every square inch. Let the shelves breathe so the eye can rest.
- Vary the Textures: Mix glass, wood, metal, and ceramic. If everything is shiny, nothing stands out.
Troubleshooting Common Issues
The Shelves Look Cluttered
If the shelves look messy despite your best efforts, you likely have too many small items. The real issue usually is 'knick-knack overload.' Replace three small items with one larger, more impactful piece. Scale is your friend.
The Display Feels Flat
If the display feels two-dimensional, you aren't layering. Make sure you have items in the front, middle, and back of the shelf depth. Use stacks of horizontal books to bring items closer to the eye level of the shelf above.
It Doesn't Feel Like 'Me'
A common mistake is buying a 'shelf-in-a-box' kit from a big-box store. From experience, the best shelves include personal history. Add that weird antique level you found at a garage sale or a framed photo from a meaningful trip. The goal is a professional look with a personal soul.