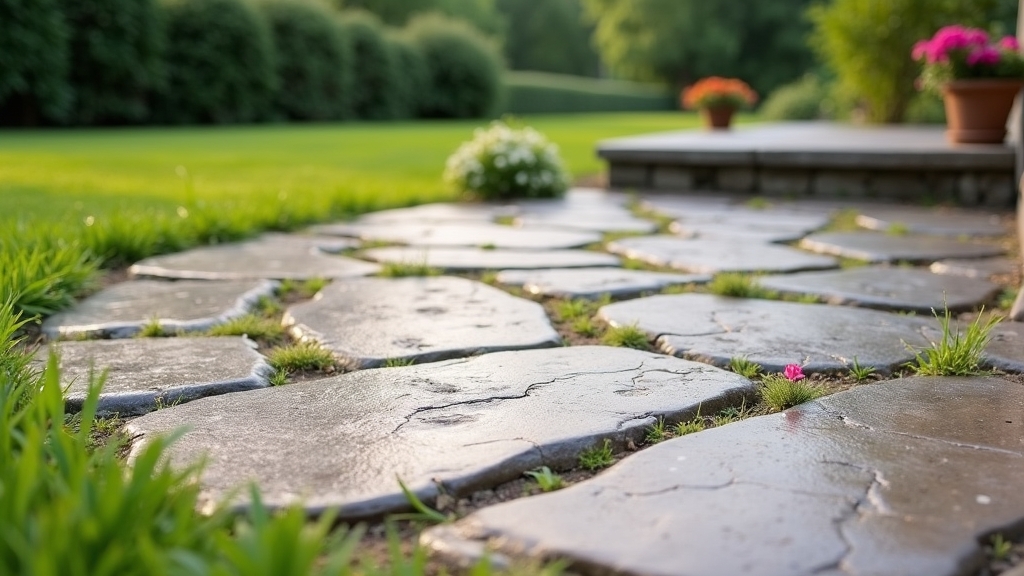
Understanding the Problem: Why Flagstones Shift
In most homes, an outdoor patio is a sanctuary, but over time, even the most beautifully laid flagstone can become a series of tripping hazards. From experience, the culprit is rarely the stone itself; the real issue usually is the base beneath it. After 15 years of maintaining my own outdoor spaces, I have learned that water, soil expansion, and improper initial installation are the primary drivers of shifting stones.
When stones become uneven, it isn't just an aesthetic problem. It creates a safety risk and allows water to pool in areas that can eventually damage your home's foundation or the patio's structural integrity. Releveling pavers and fixing these issues early can save a significant amount of money and effort down the road.
DIY Approach: The Hands-on Repair
The DIY route for fixing uneven flagstones is a labor-intensive but rewarding process. What I have found is that most homeowners can handle individual stone adjustments if they have the right patience and a few basic tools. The process generally involves lifting the offending stone, adjusting the sand base leveling, and resetting it to be flush with its neighbors.
The Process of Releveling Pavers
To fix a single tripping hazard, you typically start by removing the jointing material—usually stone dust or polymeric sand—around the stone. Using a pry bar or a sturdy screwdriver, you carefully lift the flagstone. One thing many people overlook is the weight; flagstones are deceptively heavy and can crack if leveraged incorrectly.
Once the stone is out, you inspect the base. In my experience, you usually need to add a small amount of leveling sand or crushed stone. You then tamp this down firmly to create a stable bed. What works best is a 'trial and error' approach where you set the stone back in, check it with a level, and lift it again to add or remove sand until it sits perfectly.
Pros of the DIY Method
- Significant Cost Savings: You are primarily paying for materials like a bag of sand or stone dust, which is very inexpensive.
- Skill Building: You gain a deep understanding of how your patio was constructed.
- Immediate Results: You can fix a single tripping hazard in an afternoon without waiting for a contractor's schedule.
Cons of the DIY Method
- Physical Strain: Lifting heavy stones and kneeling for hours is taxing on the back and knees.
- Precision Challenges: Achieving a perfectly flat surface across a large area is harder than it looks.
- Time Consuming: What looks like a two-hour job often turns into a full weekend once you realize multiple stones are affected.
Professional Repair: Hiring the Experts
A common situation is finding that the entire patio has shifted, not just a few stones. This is often when homeowners consider professional help. Professionals bring specialized equipment, such as plate compactors and laser levels, that the average DIYer doesn't have in their garage.
What Professionals Do Differently
A professional crew doesn't just patch holes. They often look at the drainage of the entire yard. Over the years, I have learned that if a patio keeps shifting, there is likely a larger drainage issue that needs to be addressed. Pros can regrade the entire area to ensure water flows away from the stones, preventing future movement.
Pros of Hiring a Professional
- Long-term Durability: Their use of heavy machinery ensures a more compacted, stable base.
- Efficiency: A team can relevel a 200-square-foot patio in a day, whereas a DIYer might take three weekends.
- Warranty: Many companies offer a guarantee on their work, providing peace of mind.
Cons of Hiring a Professional
- High Cost: Labor costs for hardscaping are significant.
- Scheduling: Quality contractors are often booked months in advance.
- Minimum Project Sizes: Some pros won't take on a job that only involves fixing three or four stones.
Cost Comparison: DIY vs. Pro
The key thing to remember when comparing costs is that DIY 'hidden costs' include tool purchases and your own time. For a DIY repair of about 50 square feet, you might spend $50 to $100 on sand and a few basic hand tools. In contrast, a professional repair for the same area could range from $500 to $1,500 depending on the complexity and local labor rates.
Best Use Cases for Each
In my experience, choosing between DIY and professional repair depends on the scope of the damage. If you have 1-5 stones that have dipped or tilted, DIY is almost always the better choice. It is a manageable task that teaches you the basics of patio stone repair.
However, if more than 30% of your patio is uneven, or if you notice significant 'heaving' (stones being pushed up by tree roots or frost), a professional is recommended. The real issue usually is that the entire base layer has failed, and a total lift-and-reset is required. This involves removing all stones, re-compacting the entire sub-base, and relaying the pattern—a task that is often overwhelming for a single homeowner.
Final Recommendation
If you are a beginner, start small. Fix one stone that is a known tripping hazard. If you find the process manageable and the result stable, continue to the next one. But if you find that the stones continue to sink even after you have added sand, it's a sign that the sub-base is inadequate. At that point, bringing in a professional to evaluate the drainage and base layers is the smartest move to protect your investment.


