Mastering the Basics of Pool Care
In most homes, a swimming pool is the centerpiece of summer fun, but for many new owners, it can quickly become a source of stress. Over the 15 years I have spent maintaining my own backyard oasis, I have learned that pool maintenance isn't about complex science; it is about consistency and understanding the rhythm of your water. The goal of this guide is to move you past the confusion of chemical charts and equipment manuals and into a routine that keeps your water sparkling with minimal effort. What I have found is that a few minutes of daily attention prevents the massive headaches that require expensive, multi-day fixes.
From experience, the real issue usually isn't a lack of chemicals, but a lack of circulation and physical cleaning. We are going to cover how to establish a baseline for your water, how to keep the surfaces clean, and how to troubleshoot the issues that inevitably pop up after a heavy rain or a busy weekend of swimming.
Tools and Materials Needed
Before you dive into the work, you need the right kit. You do not need the most expensive gadgets on the market, but you do need reliable basics. One thing many people overlook is the quality of their testing equipment; if your readings are wrong, your corrections will be too.
- Telescopic Pole: The universal handle for your brushes, skimmers, and vacuum heads.
- Skimmer Net: A fine mesh net for removing surface debris.
- Pool Brush: Choose one with nylon bristles for vinyl or fiberglass, or stainless steel for unpainted concrete/gunite.
- Manual Vacuum Head and Hose: For deep cleaning the floor.
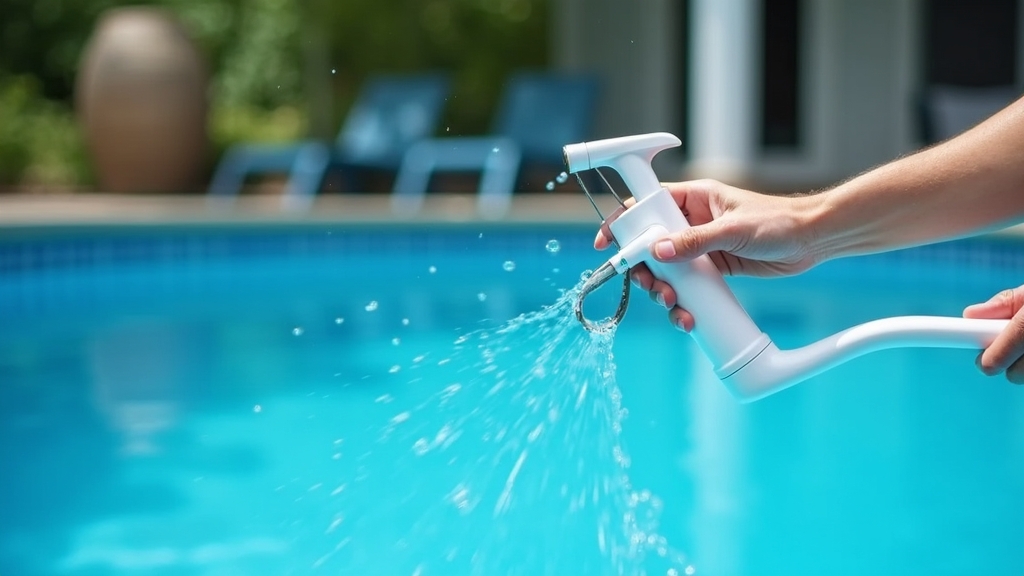
- Water Test Kit: A liquid drop kit is generally more accurate than paper strips for beginners.
- Pool Chemicals: Chlorine (sanitizer), pH increaser and decreaser, alkalinity increaser, and cyanuric acid (stabilizer).
- Filter Cleaner: Specifically designed for your filter type (sand, cartridge, or DE).
Preparation Steps
Preparation is about more than just gathering tools. In my experience, the first step to a clean pool is checking the surrounding environment. Over the years, I have learned that if the deck is dirty, the pool will never stay clean. Start by sweeping or hosing down the perimeter away from the water.
Next, check your water level. The water should be halfway up the opening of your skimmer. If it is too low, the pump will suck in air and potentially burn out the motor. If it is too high, the skimmer won't efficiently pull debris from the surface. Once the level is right, ensure your pump and filter are running smoothly. A common situation is finding that the pump basket is already full of leaves before you even start, which restricts flow. Empty it first to ensure maximum suction for the tasks ahead.
Detailed Step-by-Step Maintenance
Skimming and Brushing
The key thing to remember is that anything floating on the surface eventually sinks. Once it hits the bottom, it starts to decay and consume your chlorine. Start by skimming the entire surface. Use a slow, steady motion to prevent creating a wake that pushes debris away from your net.
After skimming, move to brushing. This is the most underrated part of pool maintenance. Algae and biofilm love to cling to the walls, especially in "dead spots" where water circulation is poor, like behind ladders or in corners. Brushing pushes these contaminants into the water where the chlorine can kill them and the filter can catch them. I always brush from the shallow end toward the deep end, moving toward the main drain.
Vacuuming the Floor
What works best for a truly clean pool is a manual vacuuming session once a week. Attach your vacuum head to the pole and hose, then submerge the hose completely to prime it—this means filling it with water so there is no air trapped inside. Once the hose is full, connect it to the suction port in your skimmer. Move the vacuum head in slow, overlapping passes, much like mowing a lawn. If you move too fast, you will just stir the debris back into the water column rather than sucking it out.
Cleaning the Filter
Your filter is the heart of the system. In my experience, homeowners often wait too long to clean their filters. Watch the pressure gauge on your filter tank. When the pressure rises 8-10 PSI above its "clean" or baseline reading, it is time to backwash (for sand/DE filters) or spray down the cartridges. A dirty filter works harder but performs worse, putting unnecessary strain on your pump motor.
Testing and Balancing Chemistry
This is where many people get intimidated, but it’s quite simple once you understand the primary players. Use your test kit to check three main levels: pH, Alkalinity, and Chlorine.
- Total Alkalinity (TA): This acts as a buffer for your pH. If TA is too low, your pH will bounce around wildly. Aim for 80-120 ppm.
- pH Level: This measures how acidic or basic your water is. Your eyes and skin are happiest when the pH is between 7.4 and 7.6. If it’s too high, your chlorine becomes less effective.
- Chlorine: This is your primary sanitizer. Keep this between 1 and 3 ppm to ensure it is actively killing bacteria and algae without irritating swimmers.
Always add chemicals to the water, never water to the chemicals. Add them in small increments, wait for a full turnover cycle (usually 8 hours of pump run time), and then retest.
Tips for Best Results
One thing many people overlook is the impact of heavy sun. UV rays can destroy up to 90% of your pool's chlorine in just two hours. This is why using a stabilizer (cyanuric acid) is vital—it acts as sunblock for your chlorine. However, don't overdo it, as too much stabilizer can actually lock the chlorine and make it useless.
Another tip from experience: run your pump during the day. While electricity rates might be lower at night, algae grows during the day in the presence of sunlight. You want your water moving and your sanitizer circulating when the threat of algae growth is at its highest. What I have found is that running the pump for 8-12 hours during the peak heat of the day yields the clearest water.
Troubleshooting Common Issues
Cloudy Water: This is often the result of poor filtration or a chemical imbalance. First, check your filter to see if it needs cleaning. If the filter is clean, check your pH and chlorine levels. Often, a "shock" treatment (adding a high dose of chlorine) will clear up the particles by oxidizing the organic matter causing the haze.
Green Algae: If you see a green tint or slippery walls, you have an algae bloom. The real issue usually is low chlorine levels combined with high phosphates (algae food). To fix this, you need to brush the walls vigorously to break the algae's protective layer, then double or triple your usual chlorine dose and run the filter 24/7 until the water clears.
Strong Chlorine Smell: Paradoxically, a strong smell usually means you have *too little* free chlorine. That "pool smell" is actually caused by chloramines—chlorine that has already bonded with contaminants. To get rid of the smell, you actually need to add more chlorine to reach "breakpoint chlorination," which breaks those bonds and cleans the water.


