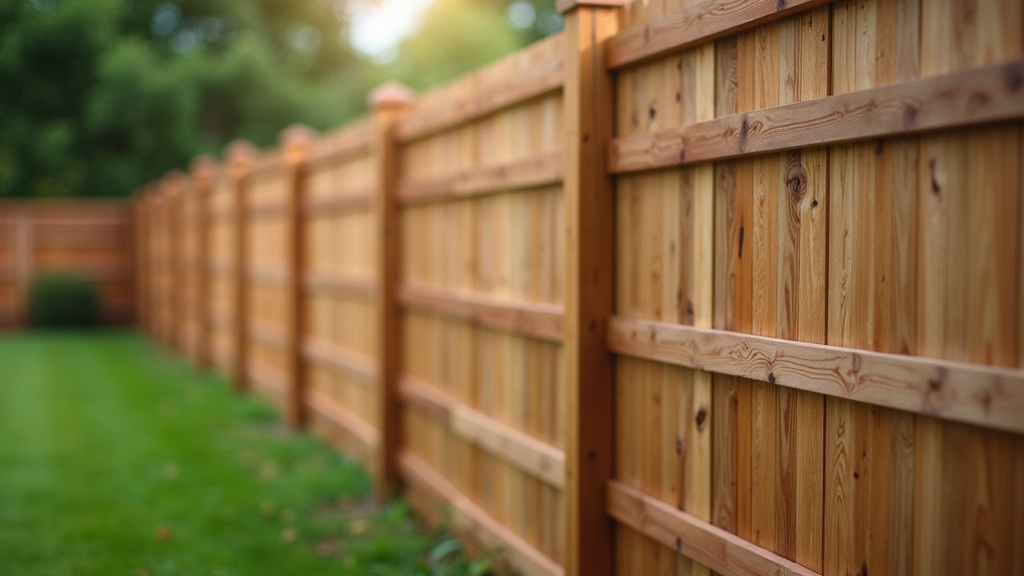
The Economics and Environmental Impact of Fence Longevity
A well-maintained wood fence is more than a property boundary; it is a significant investment that protects your landscaping and provides a windbreak that can marginally improve your home's microclimate. From an energy efficiency advisor's perspective, extending the life of your existing fence is the ultimate sustainable choice. Every year you add to a fence's lifespan prevents the carbon-intensive process of harvesting, treating, and transporting new timber. This guide provides a strategic, seasonal roadmap to ensure your wood fence remains structurally sound and aesthetically pleasing for decades.
Spring: The Assessment and Deep Clean
As the ground thaws and the rainy season begins, your fence faces its first major challenge of the year. Spring is the time for a thorough structural audit. Take your time with this; a rushed inspection often misses the early signs of dry rot or hairline fractures in the posts. Walk the entire perimeter and physically shake each post to check for stability. If a post moves more than an inch, the concrete footing may have cracked during a frost heave, or the wood below the soil line is beginning to fail.
The Right Way to Clean Wood
Before applying any treatments, you must remove the accumulated grime, mold, and mildew from winter. Many homeowners reach for a high-pressure power washer, but this is a common error. Excessive pressure can shred wood fibers, creating a 'furry' texture that traps moisture and accelerates rot. Instead, use a specialized oxygen bleach solution or a dedicated wood cleaner. Apply it with a low-pressure pump sprayer, let it dwell for 15 minutes, and scrub gently with a synthetic bristle brush. Rinse with a garden hose. Small details matter here—ensure you clean the gaps between the pickets, as this is where moisture-loving fungi often take hold.
Summer: Protection and Finishing
Summer is about UV protection. Just as the sun damages skin, ultraviolet rays break down lignin in wood cells, leading to silvering, brittleness, and warping. Once the wood is completely dry—usually 48 to 72 hours after cleaning—it is time to seal or stain.
The Water Bead Test
Before you commit to a full staining project, perform a simple water test. Splash a few drops of water onto various sections of the fence. If the water beads up, the previous seal is still intact. If it soaks in immediately, the wood is thirsty and vulnerable. Trust your instincts on this one; if the wood looks dull and 'thirsty,' it likely needs a fresh coat of protection regardless of when it was last treated.
Choosing the Right Sealant
For the best balance of aesthetics and protection, opt for a semi-transparent oil-based stain. Oil-based products penetrate deep into the wood fibers rather than sitting on top like a film. This prevents the peeling often associated with solid stains or paints. Furthermore, oil-based stains are easier to maintain in the long run because they don't require stripping before a recoat. Look for products with high trans-oxide pigments, which offer superior UV resistance while still showcasing the natural grain of the wood.
Fall: Moisture Prevention and Hardware Tuning
Fall maintenance is all about preparing for the wet, heavy conditions of winter. Your primary goal is to minimize 'ground contact' moisture. Clear away any fallen leaves, mulch, or debris that has piled up against the bottom of the fence. These piles act like sponges, holding moisture against the wood and inviting subterranean termites and carpenter ants.
Hardware and Fastener Audit
Temperature fluctuations cause wood to expand and contract, which can loosen nails and screws over time. Inspect your gates particularly closely. Lubricate hinges with a silicone-based spray and replace any rusted fasteners with stainless steel or hot-dipped galvanized screws. It is worth doing right the first time—avoid cheap zinc-plated screws, as they will react with the tannins in woods like cedar and redwood, leaving unsightly black streaks down your fence line.
Winter: Damage Control and Mitigation
In winter, your fence is mostly dormant, but it faces physical threats from snow and ice. When shoveling your driveway, avoid piling heavy, salt-laden snow against the fence panels. The weight can warp the horizontal rails, and the salt will dehydrate the wood and corrode any metal fasteners. If you live in an area with heavy wind storms, ensure your gate latches are secure; a flapping gate in a winter gale is the leading cause of hinge failure and post damage.
Practical Tips for Long-Term Durability
- Post-Saver Sleeves: If you are installing a new post or replacing one, consider using heat-shrinkable bitumen sleeves. These create a moisture-proof barrier at the ground line, where 90% of rot occurs.
- Gravel Drainage: Never set a wood post directly on dirt inside a concrete hole. Always put 6 inches of gravel at the bottom of the hole first to allow water to drain away from the end grain.
- The 2-Inch Rule: Aim to have your fence pickets at least two inches off the ground. This prevents 'wicking,' where the wood pulls moisture up from the grass and soil.
Common Mistakes to Avoid
One of the most frequent mistakes is painting a wood fence. While it looks sharp initially, paint traps moisture inside the wood. When the wood inevitably expands, the paint cracks and peels, requiring an arduous scraping and sanding process to fix. Always prefer stains over paints. Another mistake is ignoring 'leaners.' A leaning fence puts immense torque on the remaining upright posts; addressing a single leaning post today prevents a domino effect that could take down an entire section during a storm. Do not rush the process of leveling a post—ensure the new concrete or foam backfill is fully cured before reattaching the heavy panels.


